Sunday, June 20, 2010

THANK YOU, DAD...


Photobucket

...for always being such a cool guy,


Photobucket

...for giving me a love of technology,


Photobucket

...for setting a good example (I may not have picked up your organizational skills, but I've learned so much from you),


Photobucket

...for listening to my dreams and keeping me looking towards the future,


Photobucket

...and for being the best Pop-Pop ever!

Happy Father's Day!!!


Thursday, June 17, 2010

Blind stitch hemming nitty gritty

It is "Make it, Wear It" month over at Sew Mama Sew, and every day awesome sewists are contributing inspiration and information. By commenting on any of the posts, or by posting a pic of something you've made for yourself this month, you can win some incredible prizes! Yesterday, I had the huge honor of taking part and tackling the subject of hemming. In the article, I address hem width, folding, stitching, etc. I included a very brief overview of blind stitch hemming by machine, and some of my dear sewing friends asked me to elaborate on the subject. It is actually very easy, especially with the proper foot in hand :) .

Photobucket

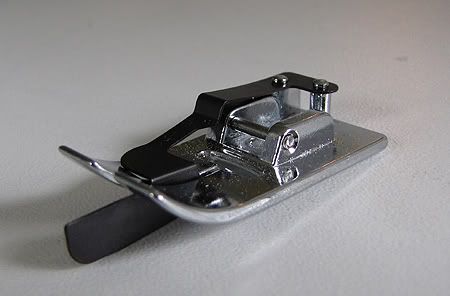
The blind hemming foot has a blade in the center that makes for perfect alignment during the stitching process. It is also great for edgestitching!


Photobucket

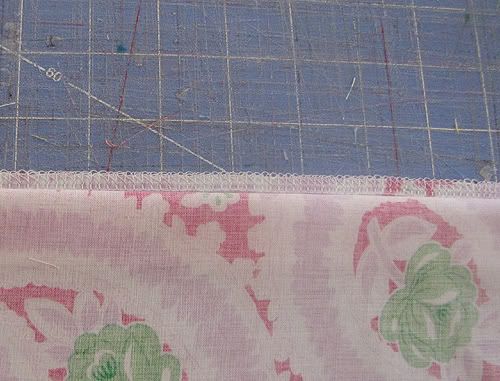
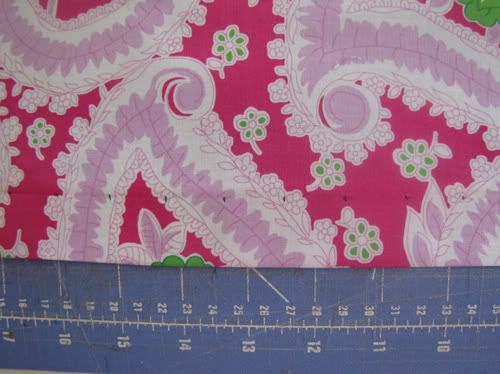
I'm going to demonstrate blind hemming using Jennifer Paganelli's gorgeous Lee Paisley from the So St. Croix line. I finished the raw edge using my serger, but you could also zig-zag stitch or even make a 1/4" fold.


Photobucket

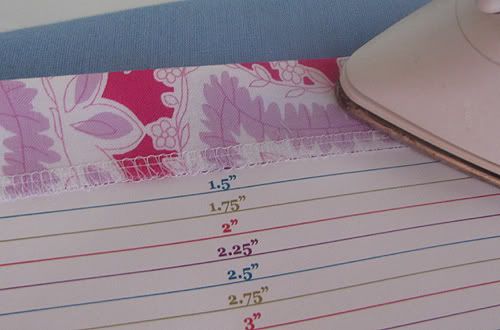
Fold the hem to the desired width. I'm using my handy dandy cardstock template to make a 1.25" fold. Up to this point, I haven't done anything differently than I would for a regular straight stitched hem.


Photobucket

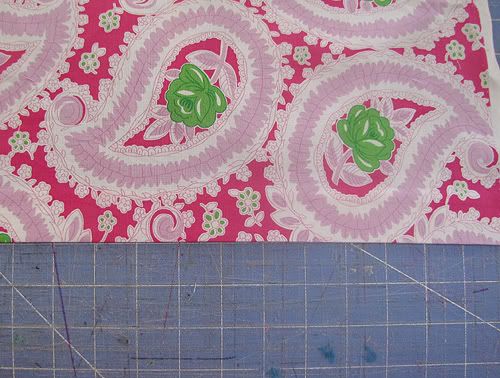
Lay your fabric out with the right side facing up and the bottom folded edge pointing towards you.


Photobucket

Lift up the top edge of the fabric up and pull it towards you, making a fold that is about 1/4" from the finished edge (note: if you made an initial 1/4" fold instead of edge finishing, this new fold should be in line with the raw edge).


Photobucket

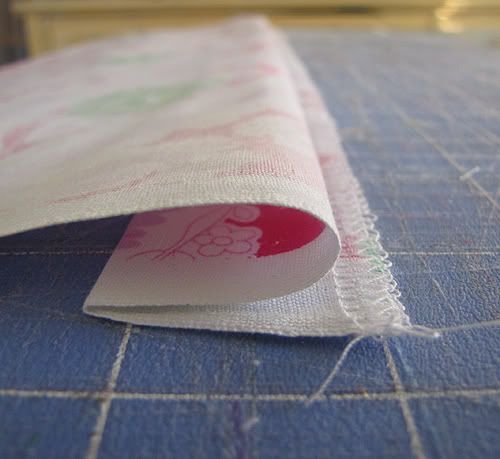
Here is a side view - the fold makes a Z shape.


Photobucket

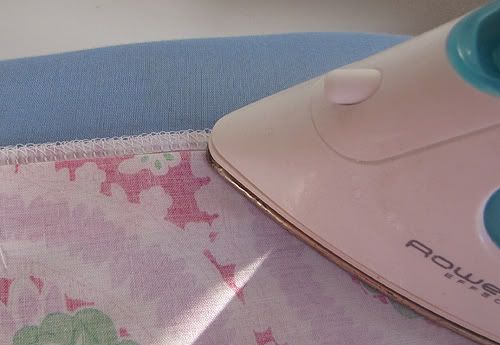
Press to set the fold.


Photobucket

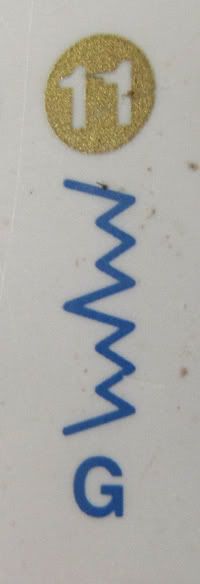
Put on your blind stitching foot, and set your machine to the EKG looking stitch shown above. The width and spacing of this stitch can be adjusted, and depending on your machine, you may be able to adjust the needle position in this setting. Before you hem your garment, optimize on scraps to get the stitching as invisible as possible.


Photobucket

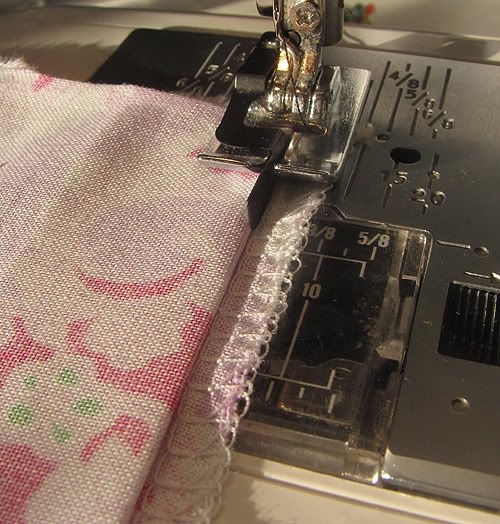
Put the fabric under the presser foot, lining up the blade with the top folded edge. Stitch along, keeping the blade flush with the fold.


Photobucket

Most of the stitching will be about 1/8" from the outer edge (or outer fold, if you made an initial 1/4" fold), but every few stitches the needle will jump over and "catch" the material at the fold.


Photobucket

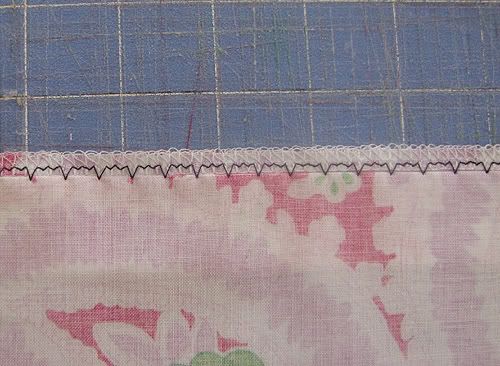
After flipping the fold back and pressing the hem, this is what the wrong side will look like...


Photobucket

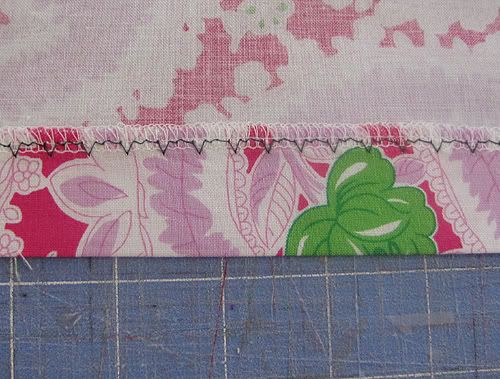
...and this is what the right side looks like! Keep in mind I'm using contrasting thread - matching thread would be much less noticeable.


Photobucket

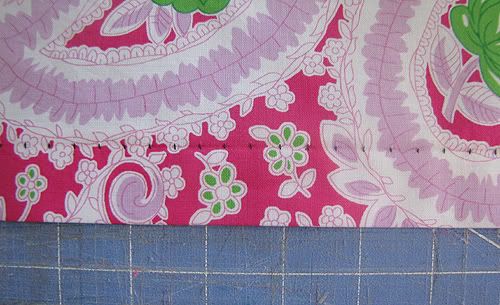
Here is a hem using a longer stitch length - even less obvious! The goal is to get as little thread as possible showing on the outside, so definitely play with your stitch settings. With thick fabrics like wool, the stitching might not show at all because the needle can catch the fibers without going through to the other side.

For more info on hemming and garment sewing in general, head on over to the Sew Mama Sew Blog. And be sure to leave a comment so you can win some of those great prizes!

Wednesday, June 9, 2010

Paper Trail

Coming from the realm of electronic publishing, I had no idea about the work involved in bringing a physical product to market. I'm used to putting weeks or even months into pattern development and testing, and then *poof* the product is instantly available online. For the paper patterns, I had to extensively reformat my layouts, proofread like crazy, and then send to the printer. For some reason, I felt like all the hard work was done at that point (hahahahaha). After the monolithic pallets of patterns arrived in my driveway, it dawned on me that I had a lot of physical and mental tasks ahead of me. Marketing, packing, and mailing...OH MY! I just wanted to hide out and sew - LOL! Anyways, I'm happy to report that my paper patterns are finally finding their way out into the world!

Photobucket

I've posted the details about each individual pattern, plus front and back cover images on my product page. Of course, there is so much more to a pattern than its cover, so I want to give you some peeks at the inside pages of the instruction booklets. The full-color sewing guides are 20 pages long, and just as detailed as the downloadable eBooks.


Photobucket

Pictured above are the sections on Materials, Fabric Selection, and Sizing from the Portrait Peasant Pattern. These "background" pages as I call them are so important for getting a great fit and just the look you are after.


Photobucket

And, yes, the famous leg charts are included!!! They are so helpful when you don't have exact measurements (like when you are making a gift, creating something to sell, or have a recipient who just won't hold still for you). I've made so many pairs of Easy Fit Pants (pictured above) based on the charts.


Photobucket

Lots of folks were wondering how I was going to pack all diagrams and instructions into a much smaller page count. By cutting out white space, and labeling with letters for extra clarity, I was able to keep the step-by-step diagrams that make all the difference for us visual learners. Simply Sweet Tops and Dresses (above) is loaded with options, so there are lots of diagrams!


Photobucket

Despite my obvious affection for diagrams, sometimes photographs are the absolute best way to demonstrate a technique. In Precious Dresses, for example, I use lots of photos to explain the addition of puffed sleeves to the bodice. It may look complicated, but it is so easy when all the steps are right in front of you! Plus, the printers did an excellent job of making the small photographs crystal clear so that all the details are visible.


Photobucket

Finally, the actual patterns are printed on high quality paper. They are minimally nested, and many pieces have multiple cutting lines for different length options. You can definitely cut and use the pieces directly, but I recommend tracing off the sizes you need as you need them. That way, you get more bang for your buck (and you don't have to keep up with a bunch of little pieces)!

On my website, I've added a section for links to the awesome shops that are going to be carrying my physical patterns (right next to the great sites that currently sell the downloadables). If you are a retailer and are interested in offering these detailed, easy-to-sew patterns to your customers, please contact us for ordering information.

Thursday, June 3, 2010

Trim it up!

My friend Melissa Stramel over at Lilac Lane is hosting a very fun Trimmed with Love Contest. You can read all about it on her blog, but basically you send in links to pics of your embellished creations for a chance to win some awesome prizes (including a complete set of the brand new paper patterns by yours truly :) ) !


Photobucket

I'm a trim nut! I have a snakepit of a drawer filled with trims, mostly vintage lengths that I picked up during my dolly sewing days. With tiny doll clothes, a little bit of trim goes a loooong way, and many times an awesome trim would be the starting point for one of my designs. I love love love rick-rack, and I've scored gobs of it at rummage sales. The vintage stuff has a really crisp, yet soft feel to it.


Photobucket

I can't resist woven ribbons, either. These tiny ones would be so precious on a baby dress.

Photobucket
These navy ribbons are so preppy and fun! I can totally see them on a key fob or belt.


Photobucket

I'm been hoarding this vintage sari trim for almost 10 years now. I was going to put it on some jeans when I was in my 20's, but now I'm thinking handbag or wallet.


Photobucket

The florals are my favorites! They are a great substitute for embroidery, and really add a ton of detail without a lot of work.

There are already some lovely trimmed-up entries on Melissa's blog - check them out for inspiration, then share your own!