The fabric is a thick nylon/lycra blend knit, which can be a little tricky to handle (especially if you are measuring and hemming your own pants). A few extra tools and notions will help maintain alignment and a good state of mind during the hemming process: a cardstock folding template (free download here), a rotary cutter/clear ruler, chalk, 1/2" wide Lite Steam-a-Seam 2, iron, an appropriate needle (either ball-point or universal, a variety pack is good to have on hand so you can get the right thickness), and matching polyester thread (black in most cases).
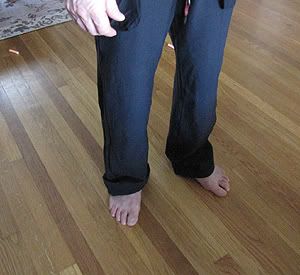
Put the pants on, wrong side facing out. NOTE: If you are going to be wearing the pants mostly with shoes (for torturous things like running and not blissful barefoot yoga), you should have them on at this point. Make a cuff to get a general idea of where you would like the hem to fall. If the pants are 1-2.5" too long, you should use a seam ripper to carefully take out the existing stitching. If they are longer than that, you can leave the stitching in because you are just going to cut it off anyway.
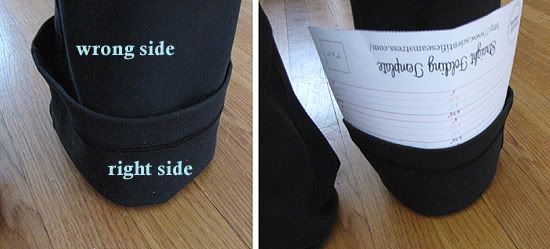
The hem fold should hit 0.25" to 0.5" from the floor at the back heel, depending on your wearing preferences. Insert your handy dandy folding template (free download here) into the bottom of the cuff as shown above. Use it to measure how far your new fold will be from the existing bottom edge (3" in my case). If you are as scatterbrained as I am, you should write this number down.
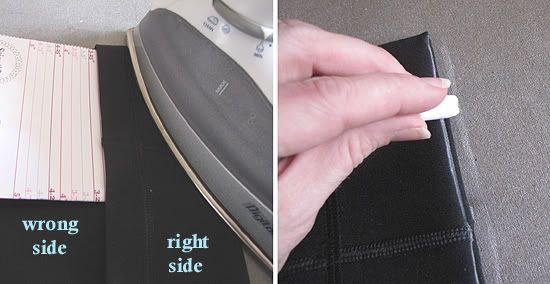
Set the iron to a temperature that is high enough to make steam, but not so hot that it melts the fabric. I used the highest setting and didn't have a problem, but a different fiber composition might not hold up as well. Fold the folding template in half widthwise (numbers facing out) and reinsert into the cuff. Use it as a guide for measuring and pressing the new fold. After pressing all the way around the cuff, go around again (guide in place) and mark the new bottom edge with chalk.
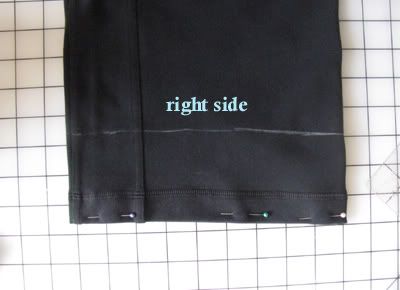
Uncuff the pants and turn them right (chalk-marked) side out. For each leg: lay flat, and align and pin the existing bottom edges to prevent shifting during the next step.
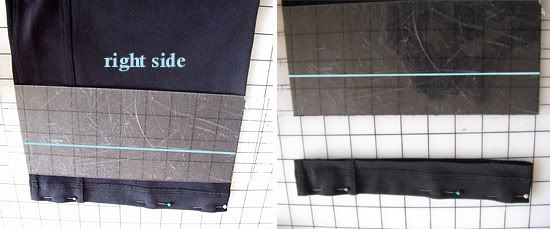
Place a clear cutting ruler on the leg, and position the edge 1.5" below the chalk line (highlighted with blue) as shown above. Don't mix up your cutting edges here, or you will wind up with capris! Use a rotary cutter to cut through both layers. Save that scrap from the bottom...you can use it for testing stitches later!
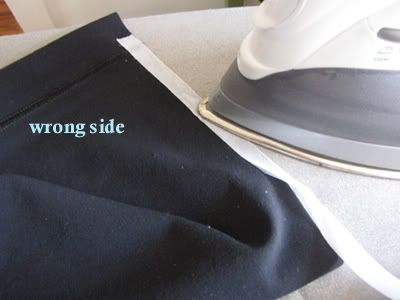
Turn the pants wrong side out (again). Following the manufacturer's instructions, fuse the Steam-a-Seam in line with the bottom cut edge. Once you have applied it all the way around, remove the paper backing.
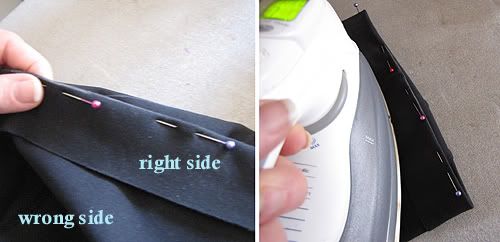
Fold the taped edge over to the wrong side. Arrange the hem so the chalk line is right at the fold. Pin the fold very close to the marking. Finger press the raw edge into place all the way around (the tape is a little sticky, so it will hold), then set by pressing with the iron.
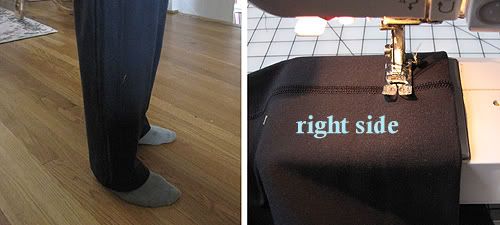
Turn the pants right side out. Now is the perfect time for a try-on. If you need to make an adjustment, simply hit the hem with steam from the iron and peel apart. Reposition and press again (you may need to retape if the original tape does not hold).
Now it is time to stitch! There is a lot of great info on the web about sewing knit fabrics, so I won't go into too much gory detail. Chances are, the original hem stitch was done with a coverstitch machine. If you don't have one of those - no problem. A regular sewing machine works great with the proper needles and settings. You should use a stitch that has some stretch to it (a plain straight stitch can pop if overstretched). I used a basic zig-zag stitch set to the widest width (7 mm, I think) and a medium stitch length (default spacing). The tension was set a bit lower than for normal stitching to prevent puckering. Another great option would be double top-stitching with a ball-point twin needle (excellent tutorial here).
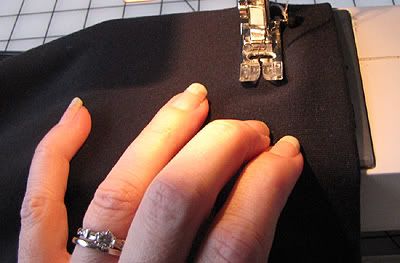
Starting at the inseam, stitch about 1.25" from the folded edge. If your machine doesn't have a reference point this far from the needle, you can mark one with a pen or tape (I use the edge of the switch that ejects the faceplate). Use your fingers to lightly "steer" the fabric as you stitch. As in yoga, no extreme pushing or pulling! You may need to give it a nudge when sewing over thick seams, but otherwise it should cruise along without much help. If it seems stuck, you may need to loosen the tension or increase the stitch length. OK, I promised not to go on and on. Really, the best thing you can do is optimize stitching on those scraps.
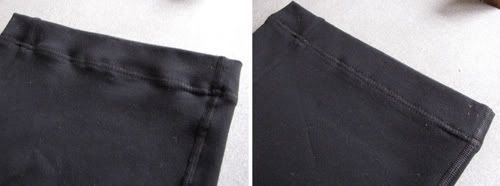
Don't be concerned if your stitching comes out a little wavy - a quick steamy press with the iron will make it factory flat.
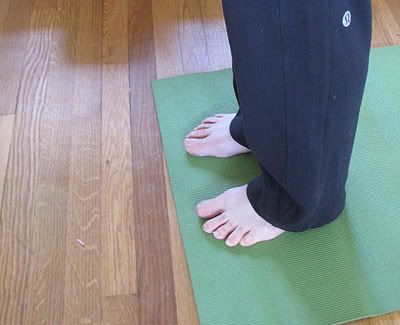
Tada(sana)!
The stitching doesn't really show up in the picture, but that is the whole point. Since it is black on black, the stitching blends right into the hem. As long as the stitching is flat and even, no one (other than you) will ever get close enough to your feet to ponder your choice of stitch settings!

Perfect! Del is all set for some yoga now! Have fun! Thanks for the great tutorial!
ReplyDeleteI love the "tada(sana)" comment!
ReplyDeleteVery yoga appropriate!
Holy cow, I LOVE when you just said "Tada(sana)!"... so cute and clever. Great job.
ReplyDeletelululemon offers complimentary hemming on all pants for the life of the garment, for the next pair!
ReplyDeleteI just hemmed a pair of Prana yoga pants using your awesome tutorial. I have never hemmed pants, much less knit pants, and they turned out so well! Thank you so much, now I don't have to drop $10 to go get my stretchy pants hemmed, yay!
ReplyDeleteThanks to your awesome tutorial, I can hem my petite daughter's beloved yoga pants! Thanks for the great instruction.
ReplyDeleteGreat work! I'm actually having the opposite problem in that one of my favorite pairs of yoga pants is too short. Do you think it would be possible to let out the hem on this sort of material?
ReplyDeleteLate to the party here but I mostly quilt with limited garment making, so really needed your tips! Imagine my dismay when I got tall yoga pants via ebay and they were three inches too long for me at 5' 10" :). I used your info (chalk was brilliant) and armed with my sewing machine manual used my twin needle and they are awesomely the right length! Thank you so much
ReplyDeleteBonito blog, gracias por compartir, me gusta.
ReplyDelete