Showing posts with label shana tunic. Show all posts

Wednesday, September 3, 2014

Straighten the sleeves on the Emily/Shana


Normally the Sisboom Emily (and Shana) tunics have a gorgeous bell sleeve, which I love! 

however... Cheeks has very short limbs and bell sleeves tend to fall into everything when she wears them, so for her Emily I decided to do a straight sleeve and a quick how to for you!


(Berry showing off those gorgeous bell sleeves)


If you want straight sleeves all you need to do is attach the bell piece right under the sleeve piece and just fold it over - you use the bell sleeve cutting line you want for length that way still, but end up with a straight sleeve!  


Is that not one of the easiest tutorials? haha. I'll have to think up something a bit more fancy for next week... Any ideas?

I also did straight sleeves on my Shana tunic last fall!


Now  no reason to pout about fall, there are some GREAT patterns available in the shop for fall sewing!


Monday, November 4, 2013

A Tutorial for Adding a Hi-Lo Hemline to the Shana!


(and the added bonus of how I did the sleeves)

Hello there sewing peoples! Jeanine here again and this time I want to show you a very quick and easy how to for getting your Shana to have a hi-lo hemline!  I ADORE hi-lo hemlines! This is likely largely due to the fact that since becoming a mom my "style" includes a lot of tights and jeggings and skinny jeans, especially as the weather gets cooler and the Shana is one of my favourite shirt patterns because of the unique collar and relaxed fit. So here I combine two things I adore! 


I cut my front pattern piece at the 27" length line (no picture). For the back I drew a line starting at the 27" line on the non fold side of the pattern piece and gently angled it down. How far down you go depends on how much of a hi-lo you are wanting to do. I went down to the 33" cutting line and find it perfect for covering the bum without looking all that extreme. Business in the front and party in the back! 

(as you can see I played with the where I wanted to cut my hemline a few times before deciding) 

For the sleeves I simple added the "bell" pattern piece to the sleeve pattern piece and folded it in line with the top of the sleeve top piece and I cut at the longest cutting line. 


Here is a back shot showing the hemline in the back, pretty isn't it?! 


The fabric is Sisboom Lucky Girl, Marcella for the main print, and the diamonds are from the Madison from the sisboom Happy Land line.

and a side view

What do you think of the hi-lo hemline?  Any little pattern change tutorials you would like to see here on the blog? Do you prefer chocolate or vanilla ice cream?


Saturday, August 24, 2013

Day 4 of the Shana and Emily Sew-A-Long

The final day! YAY you for making it to here - the end is in sight ! so let's dive right in :)


Today we will start at the sleeves, in between the 2 notches (which you can't really see because of poor photo positioning (oops) you will set your machine to the longest stitch length (no backstitching!) and sew a gathering stitch or two. Do this on both sleeves.

Now take your first sleeve and match the edges up and the center gathering with the shoulder seam.


I pin each edge and center and then pin the in betweens - sometimes I need to take a pin out here and there to make sure the material lays nicely but for the most part I find this the easiest way to make sure everything stays where it should


Once you have that sleeve pinned sew it on! Make sure you are back to regular stitch width :)


Do those steps for each sleeve and then move on over to your serger or set your machine to zig zag. It is time to finish some edges/seams.

I brought it over to my serger and finished the sleeve seams I just sewed first.


Then I serged the sleeve bottom edges - where your hand will be :) If you don't have a serger you can skip this since you will be doing a double fold hem


Then Pin up the sides - be sure to match up your under arm seams! and Sew and finish! I serged first and then sewed - I sometimes do this if I know there won't be a fit issue :) 


I Then serged the bottom of the tunic - but again if you don't have a serger you can skip this step since you will double fold the hem.


Now fold up your sleeve ends and you bottom ends and sew! If you did not serge then do a double fold hem :) Remember there is a VERY handy folding template in your pattern :)


At this step I tried my Shana on. As you can see in the pictures the sleeves are a bit too long - even for my extra length sleeve loving self and I decided I wanted a bit of cinching in at the back for a bit of a more fitted look. I would NOT do this if I had made mine shirt length. But since i did more of a dress length I decided to. so make any final hemming adjustments as you deem fit.

If you did shirt length shana or if you did the emily - then congratulations you are done!!!! If you love the fit of you longer length tunic - then YAY you are done as well!!! If you want a cinched in back like mine - then keep reading :)


Now before I go on I want to say - if I was doing this again I would save myself the headache of stretching out elastic and just make a bias tape casing on the inside. So there you have it. 

Either way - cut a piece of elastic the width of your desire. I did the width (ish) of the small of my back.

and in my very accurate way of measuring I looked at that picture I took of myself trying on my Shana and thought I think it would look best to have the gathering about a hand width down from the underarm seams.


So I pinned the elastic to each end and then the middle and then the quarters.


And then pull the elastic (I have to hold it behind and in front where I am sewing to keep it tight.) Stretch as you sew if you do this method. but again. the bias tape casing would be much easier and give the same look, without the hassle.  


I sewed to the top and bottom of the elastic.

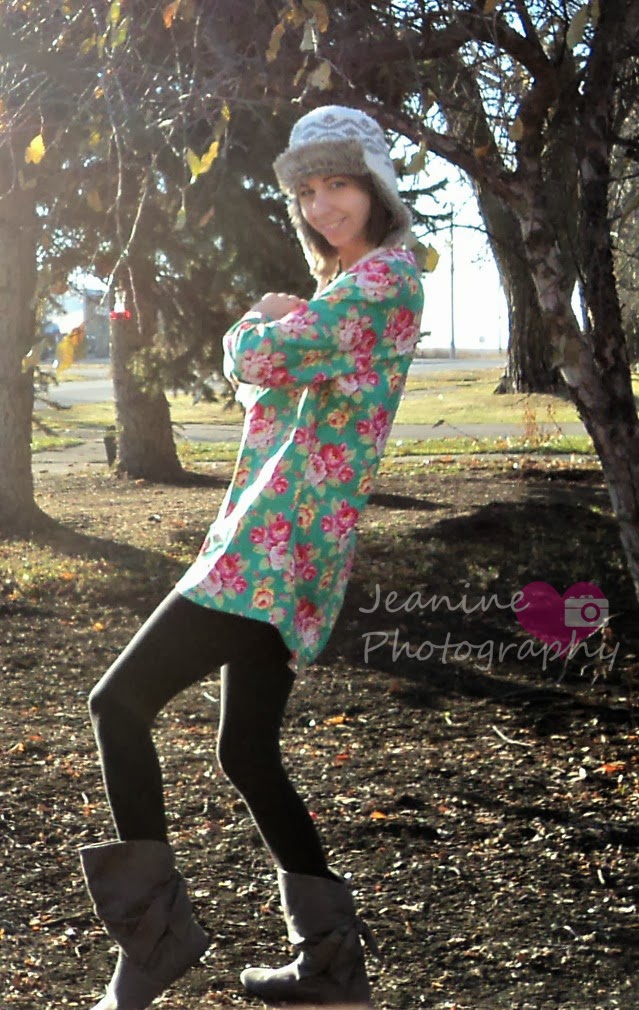
and voilĂ ! DONE! and I ADORE my Shana !!!! Corduroy over tights with boots - fall cozy perfection! And this neckline - LOVE it!!!! 

Don't forget to get your Shana/Emily into the album over in our facebook group!!! Prize/s on the 4th of September, 2013! 


So do you love yours as much as I love mine?


Friday, August 23, 2013

Shana and Emily Sew-A-Long day 3!


Hey hey there! How goes things? Sew a long going good for everyone so far? I hope so! remember you can find us and get a hold of us the easiest in our facebook group :)

Today we are going to work on that back collar and then getting the front and back pieces together! 

so take your back collar facing and lay it as seen below (right sides together)and pin it around matching up each notch.


Sew that on by sewing along the pinned edge and then iron the seam to the inside as seen below


Now you take the second back facing piece and lay it over the top lining up the edges


Sew it on and then press over the the edges as per the pattern just like we did yesterday.


Now take your front piece and open up the two facings so it lays flat 


Now take your back piece and unfold those facings as well and lay on top of your front - matching the seams- particularly the main fabric and facing that will be seen on the front seams.


Pin the front and back together


and this is how it looks pinned together from the back - just thought I'd show it from both sides !


Stitch the shoulder seams (what we just pinned) and then make a snip on your main fabric before the collar bits on both sides- but do NOT snip through your seams! (it looks like I cut over the stitching - but that is because I was trying to hold the scissors and shirt and camera and I am not so coordinated)


Now zig-zag finish your main fabric seams - do NOT zig zag over onto your collar. Below you can also see my zig-zag settings. I don't change them from normal just switch to zig-zag and this is what it gives me.


Now press open your collar seams on the inside, you can see below I am finger pressing them open. 


Now all that ironing over you did yesterday and today with folding over a bit on the inside facing will come in handy! This step is easy, but a bit time consuming. Fold over to the inside your inside collar facing and line it up to the stitching edge as you can see below and pin it good! pin it real good :)


Once you have done that for the entire facing - front and back take it over to your machine and turn it right side out and slowly topstitch the edge! 
This is why pinning it to the stitching line is so important - if you are very careful in this step you should catch the inside facing all as you topstitch. If you missed some you can go back and unpick those seams and  re-align and re-sew or you can very carefully hand stitch any places where you didn't catch the facing in the stitching.


ok everyone - that wraps up day 3! The hardest part is over with :) How is everything going? Do you love it so far? Any questions/comments/concerns? Find us on facebook!

Thursday, August 22, 2013

Shana and emily Sew-A-Long Day 2!

 Welcome to day 2! Today we start the actual sewing of the tunic - yay!!!

The first thing I want you to do is to set your machine to the longest stitch length there is and sew a row or two of basting stitches in between the tunic front. 2 rows will help keep your gathers nice and pretty as you sew the collar on, just so you know why to take that extra time to sew that extra row :)


You can see here where the stitching goes and also the collar direction...


Gather lightly by pulling the bobbin threads - to match up with the collar center two notches (seen below)
and put your collar front right sides together with the tunic front - the collar piece should be looking down as seen in the above photo. 


Now pin pin pin! Seriously - don't be afraid to use many pins!


And here you can see the one collar piece all pinned together to the tunic front (see how many pins I used!)


Now be sure to set your stitch length back to normal  and sew about the collar along the pinned edge.

Turn your collar out and press the insides edges towards the collar facing.


Once you have the innards ironed to the facing get your other facing piece and lay on top of your sewn on one as seen below 


Now sew a long the outside edge (as seen below)


after stitching you will need to trim the inside down - I used pinking shears and they worked perfect and everything folded out nicely.


Then iron the piece you just sewed on all the way around so you have a bit of a folded about lip as per the patterns directions.


Now don't worry about finishing that front with topstitching just yet - we will get to that! 

You will now do your back collar/facing :) But tomorrow ! I think it is snack time which means time to stop for the day! Don't forget to find us on Facebook!

Who wants to tell me how the sew-a-long is going? or your favourite colour?? My favourite colour is pink :)