Tuesday, December 24, 2013

Bosco gets his Portrait!


Today I am going to take one of our free patterns, the Bosco Bowtie and use it to add a bit of fun to our Portrait Peasant dress.


Now of course the bowtie pattern is completely adorable as a bowtie, but I only have daughters and so I decided to girl up the bow tie by adding it to a dress :)

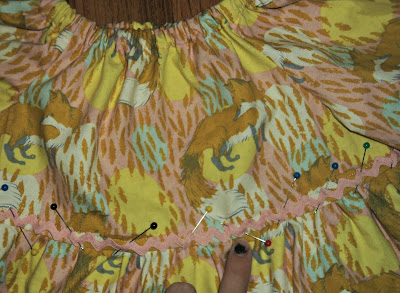
First I pinned and stitched some ric rac down along the seam (I used the empire bodice option). This step is  not necessary, but I just LOVE the look a bit of ric rac gives the finished dress. 


Next I took a sew on snap back and stitched it on. I put the bow over the dress and tried a few different spots out and decided I wanted it a bit off center. I didn't want it to get lost in the sides but also did not want it to be smack dab in the middle. 


And I stitched the opposite snap onto the back of the bow tie (which I did 100% sewn)


Now the bow just snaps on and off the dress!! I know what you are thinking, "Why not just sew the bow right onto the dress?" The reason I did not sew the bow right onto the dress is this, I have done that before, and after once through the washing machine that bow never looks the same! So this way I can snap it off and keep a perfectly perky bow and have a clean dress! 


Doesn't the bowtie just add the perfect finish to the dress?! I absolutely love it! I personally find the fun in sewing is in the finishing details, those extra touches that take it from plain to fabulous :)

 I also made another bowtie and attached it to a clip for a cute hair accessory ! The oldest was a tad jealous the youngest got a bow on her dress and NEEDED to have a bow as well.


To best keep up to date with our happenings (new patterns, sales, and to connect with us) join us in our facebook group! We'd love to see you there! 


Tuesday, December 17, 2013

Trim Your Boxers While you Trim the Tree!

I have a REALLY fun tutorial for you today to girl up the Sisboom Tommy boxers

This tutorial is so super easy! Maybe we should call it an inspiration idea with a couple pictures in stead of a tutorial... 
Anyways, I want to challenge everyone to sew something up for themselves in the next month! Maybe you aren't sure about making a dress or clothes to wear out in public just yet, but boxer shorts (and maybe even a matching shirt?) I think you can do and it is a great place to start. Especially since you don't even have to leave the house in the outfit! I used the Sisboom Patricia top for my matching shirt, the side vents just match!

  • For the trim I picked out 2meters (and have about 3/4m leftover) of lace/crochet 2 1/4inch trim.


Ok, Let's get going on this! I want you to follow the pattern directions right until the last step! Before you sew the bottom hem I want you to pin on your trim to the underside like shown below.


Then you will sew the hem and your trim on in one fell swoop!


Ta-Da!!! Pretty? I think so! I am also quite pleased at how well the trim pattern matches the fabric pattern (it's the little things that make my day usually) 

Fabric is from the Sisboom Honey Child Line 


So who is in for more self sewing?! Ready to make it a New Years resolution? 
(To sew myself one thing I could wear out of the house was my resolution last year by the way ~Jeanine)

Sunday, December 15, 2013

12 days of Sisboom!


Hello all! Jeanine here again!

Over here we really do love everything Sisboom. The bright colours, the florals, the happy feeling it puts in my toes! I love looking at the Sisboom facebook page for inspiration and I love looking in my book, A Girls World for inspiration as well!

Here are some of my favourite sisboom sews I've done this year with Sisboom patterns and gorgeous Sisboom fabric! If you haven't sewn with the fabric yet you really should try it, gorgeous feel and a lovely drape for clothing. The patterns are loaded with options as well and tips for a great fit!

Left-Right, from top to bottom. The Carly bubble romper, Angie dress, Angie dress, Shana tunic, Shannon girls shift, Vanessa dress/top, Jenny dress and the Devon

 In my Christmas sewing this year I decided to make my daughter and her cousin some cowgirl vests, but I didn't want to do plain vests, I wanted girly, sisboom-y vests!

I checked out the Sisboom facebook page and I brought out my copy of a Girls world and felt the inspiration to get out my beads and I spent an evening in front of the TV hand sewing on beads!


Here are the completed Festive Vests with the beaded badges and each girls initial on them. I made the badges out of felt, beaded them and then sewed them onto the vest front side piece and lastly I sewed the vests together as per the pattern.


We have 28 patterns (+ 2 freebies) done together with Jennifer of Sisboom and more coming in 2014!  
So keep your eyes open  for more Sisboom fun to come!

You can have our blog posts delivered to your email by signing up in the upper left corner and/or follow us on facebook as well and/or join our facebook group!

The blog tour continues!!!

Monday, December 9, 2013

Owls for All - a group sewing project for kids!

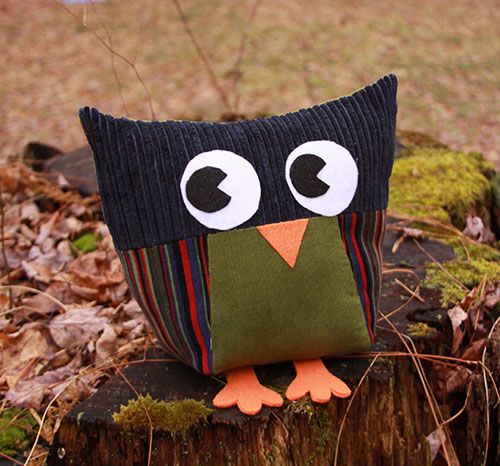
I recently put together a little sewing pattern for my son's 4H group.  It was such a success, that I decided to turn it into a free tutorial.  The format is a bit different than my other patterns/tutorials, as it contains separate instructions for the instructor and the students.  It allows you to prepare and host the ideal sewing experience so the kids just swoop in, do the fun stuff, and learn a ton in the process.

 photo owlcover_zpsfdb62dd9.jpg 

This "owlie" has just the right amount of pieces to make the project interesting, but still quick and easy.  It requires only straight machine stitching and just a touch of hand stitching. You prepare the fusible facial features and feet in advance. I include 3 shape options for the pupils - heart, round, and pac-man.

 photo owltrace_zps03b62d09.jpg 
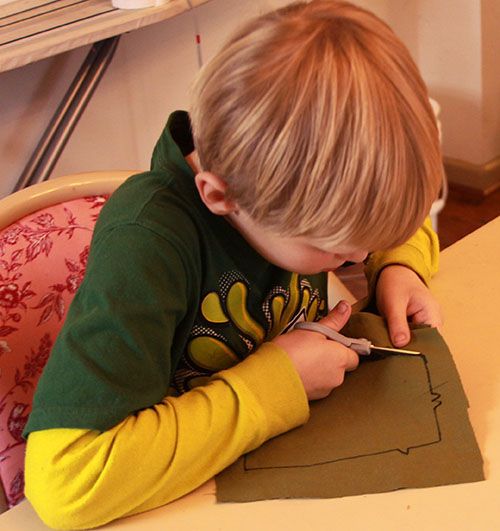
The patterns are printed onto cardstock, and traced onto the fabric.  For little fingers, this is much more accurate (and less frustrating) than pinning and cutting around a pattern.  

 photo owlhelper_zps20243ea5.jpg 
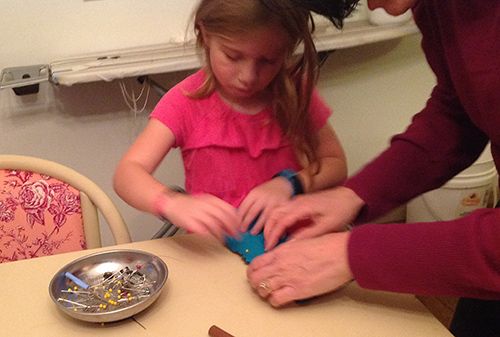
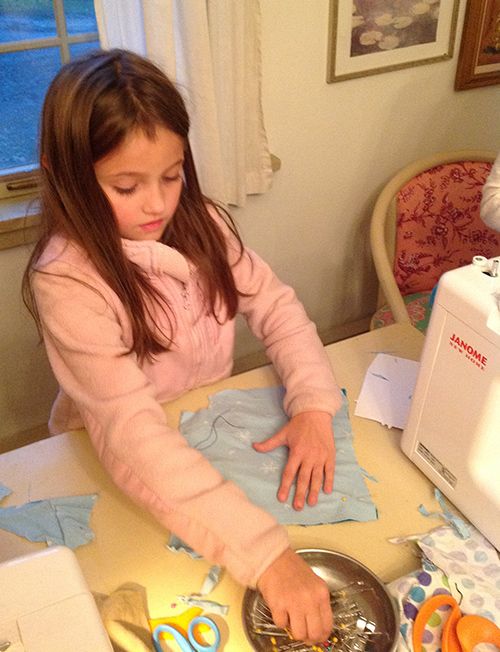
If possible, get the parents to stay for the fun.  Adult helpers make the process so much easier and more efficient.  Also, since you are dealing with sharp implements and a hot iron, it is good to have the extra supervision.

 photo owlpin_zpsc7454cf0.jpg 
After the first few piecing steps, the kids are amazingly independent.

 photo owlstitch_zps4687ad2c.jpg
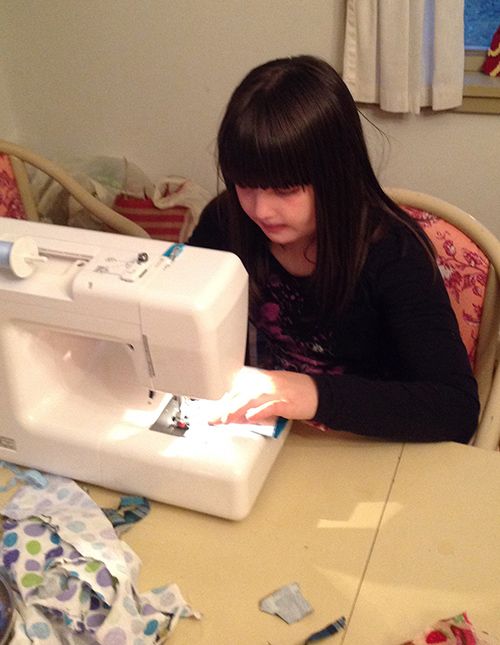
All of the stitching steps use a 1/4" seam allowance, so the kids just align the edge of the foot with the fabric edges and "steer" the fabric through the sewing machine.

 photo owlsall_zps7ae9a725.jpg
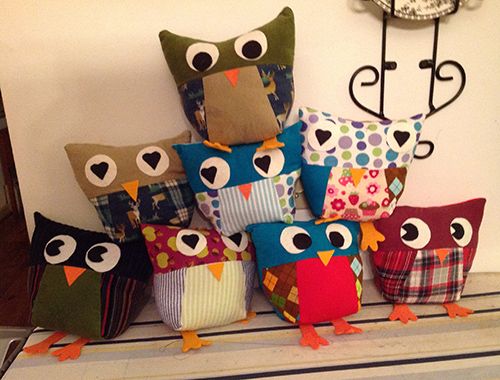
Here is a group shot of our groups' owls.  Didn't the kids do an awesome job?  This project is great for boys and girls alike.  Our 2nd to 5th graders were able to complete the owls in about an hour and a half, with minimal adult support.  We even had a 4 year old little sister participate, and even though she needed more help than the older kids, she was very engaged in the process.


 photo owlproud2_zpsab1e196c.jpg
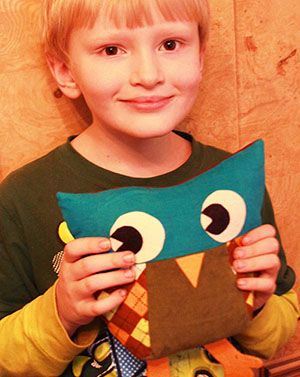
This is a great project to do with just one child, as well.  After our sewing party, Louis went on to make an owl for his teacher.  You and your child could even make several owls assembly-line style, and check off lots of gifts on your list.  This will give your child sewing skills that will last a lifetime, and the opportunity to feel the joy of giving handmade gifts from the heart.

Wednesday, December 4, 2013

Blog Tour and Giveaway...Quilting ISN'T Funny!


Quilting Isn't funny is a collection of articles, insights, and random musings by Megan Dougherty.  I can't even begin to describe the hilarity of the contents, so I will just copy and paste from Amazon:


Book Description
Publication Date: November 10, 2013

Quick! There’s a horde of brain-eating zombies headed your way: you only have an acrylic ruler, some safety pins, and a bias tape machine. What do you do?

And, hey, zombies aren’t the only scary things quilters have to deal with. What happens when your teenager discovers your stash? What are your rights when you get arrested by the Quilt Police? Do you know how to tell which urban legends of quilting are based in fact? What should a quilter’s insurance policy actually cover? And what did the Buddha have to say about all this?

Quilting Isn’t Funny is a collection of hysterical essays by the inimitable creator of the Bitchy Stitcher blog, Megan Dougherty. This is quilting humor with a sharp edge, pieced together from wit, snark, and a little bit of satire. Turns out, quilting is funny. No, make that freakin’ hilarious.


I was first "exposed" to Megan on vacation a couple years ago.  I had spent way too much money on magazines for pool reading, and had a good mix of sewing and trashy celebrity gossip.  Megan's article in Quilter's Home had me laughing hysterically, disrupting other sunbathers.  Granted, it was very hot, and I had downed a margarita...but this was funny, funny stuff.  After reading about Megan in the Contributors section, I decided to stalk her blog and follow her on Facebook.  Even though calls herself the Bitchy Stitcher, she is actually very nice (I got to hang out with her at Quilt Market, and she didn't scowl or hiss like one would expect).


In addition to quilting and writing humor articles, she is a mom and creator of the annual Shirtless Man and Spicy Burrito Calendar.  Her book is a round-up of her very best articles, plus some great new, never-seen-before content.  You can read more about it here:

http://thebitchystitcher.blogspot.com/p/my-book.html

As someone who is on the fringe of the quilting world, this book gave me great insight into the minds and lives of die-hard, traditional quilters.  I know I've met them at shows and quilt shops, but I can't say I've gotten to know any of them all that well.  Sure we use the same tools and hoard the same fabrics, but they are a different bunch for sure, and they don't take to outsiders quickly.  It takes many years to be truly become one of them.  Then there are the young, hip modern quilters...Megan knows all about them too.  In fact, she gives the best definition of Modern Quilting EVER in her glossary.

This book would make the perfect gift for anyone who loves to sew and laugh!  Buy it for yourself, even.  I can't tell you how much I enjoyed tuning out my family and indulging in this read.  You can buy the book directly from Megan in paper or PDF format (see the link above), or from Amazon in paperback or Kindle format. OR - you can WIN a copy by leaving a comment about quilting...is it funny, or not?  Or just say something silly about sewing in general.  I'll choose a winner (randomly, because that is how I roll) on Wednesday, December 11th.

You can also win the book from one of the other fabulous bloggers on Megan's book tour:

Dec. 2 – Maddie Kertay  - Bad Ass Quilter’s Society
Dec. 3 – Sam Hunter – Hunter’s Design Studio
Dec. 4 – Carla Crim – Scientific Seamstress
Dec. 5 – Scarlett Burroughs – Craft Gossip
Dec. 6 – Jill Dorsey – Made With Moxie
Dec. 9 – Victoria Findlay Wolfe – Bumble Beans Inc
Dec. 10 – Lynn Harris - Little Red Hen
Dec. 11 – Teresa Coates – Crinkle Dreams
Dec. 12 – Joshua Helms - Molli Sparkles
Dec 13 – Liz Kettle – Stitch Journeys
Dec. 14 – Leah Day – The Free Motion Quilting Project
Dec 16 – Lisa Sipes – That Crazy Quilty Girl
Dec. 17 – Charlotte Newland – Displacement Activity
Dec. 18 – Teri Lucas - TerifiCreations
Dec. 19 – Cheryl Sleboda – Muppin.com
Dec. 20 – Kelly Biscopink – Stitchy Quilt Stuff
Jan. 6 – Generation Q
Jan. 8 – Rose Hughes – Rose Hughes – Quilt Artist
Jan. 9 – Janice Ryan – Better Off Thread
Jan. 10 – Flaun Cline – I Plead Quilty
Jan. 13 – Heather Jones – Olive and Ollie
Jan. 14 – Meg  – Without A Stitch On
Jan. 15 – Laura Lochore – Quokka Quilts
Jan. 16 – Elaine Wong Haselhuhn – Dashasel Sews
Jan. 17 – Kim Lapacek - Persimon Dreams


Monday, December 2, 2013

I would be A-line-ing if I said this wasn't a fun Tutorial!


Colour blocking is always fun - am I right? And it is so easy to take our A-line dress pattern and with a few simple steps you can have a fun new look! Our A-line dress pattern also comes with doll sizes!
See bottom of the post for a cyber Monday code for 50% off (Dec 2nd, 2013)


To start with I find it easiest to redraw the pattern. I use a newpaper roll end that I picked up for $5 years ago from the local printers and there is no end in sight! (It is crazy how much paper is left on a roll end!) 


After I have the basic shape drawn I decide on what I would like my colour block chunk to look like. Do these steps for the front and back pieces. For the front you can see I went for a up shape that tapers at the edges. In the back I went for a straight across band. 


It is very important you measure the width of your colour block so you can get it the same for both the front and back! We want those side seams to line up! It is also important to pay attention to the overall length so that from armhole to bottom is the same length for both the front and the back.  


For the 'straight' across bottom hemband on the back of the dress I used the hemline template so that the curve is perfect to follow the bottom as well. 

You will cut your pattern pieces now according to how you drew them. the part you marked off as the colour block is it's own pattern piece now. 

IMPORTANT: when you cut the colour blocked pattern pieces it is VERY important to add a seam allowance to both the main dress and the colour block. If you look below you can see I gave myself the standard 1/4 inch seam allowance.


Now aftre you have cut your pieces out you pin the colour blocked piece to the main piece and sew them together with the seam allowance you gave yourself.


Below you can see the sides line up and so does the colour block! Very important to measure well :) As you can see my measuring on my back piece was a bit off. 


Now you sew up the pattern as directed! Be careful to line up the side seams when you are putting your front and back together !


This dress is such a fast and easy sew! Even with the colour blocking... and checking of facebook as I sewed... I had this dress completed in a short evening!


Now don't delay and take advantage of the cyber Monday deal! 


50% off using the code CYBER50 in the etsy shop! https://www.etsy.com/shop/scientificseamstress
Remember the code is good for December 2nd, 2013.