Wednesday, December 15, 2010

Heavens to Betsey (and a giveaway)!


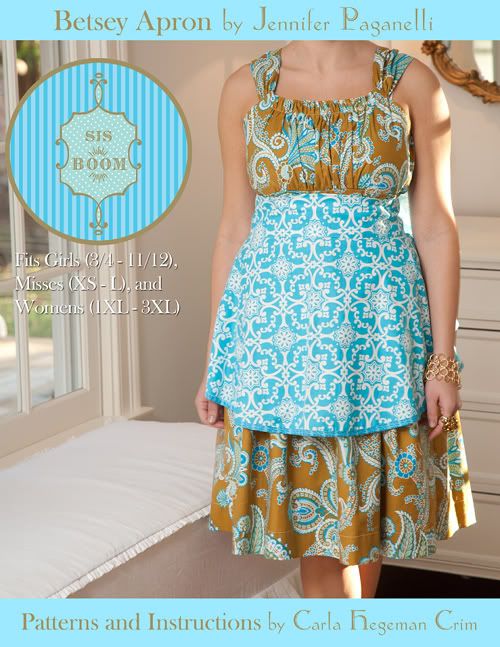
New Pattern alert! Jennifer came up with the most adorable, hip apron EVER, and I turned it into an easy to sew, quick, and very fun pattern! If you are still hemming and hawing about gifts for teachers, girlfriends, etc...look no further.

Photobucket

This apron has a great retro feel, but has a very current look...especially if you use awesome Sis Boom fabrics!


Photobucket

The apron in the picture above is made from a great mix of new and old Sis Boom prints. I LOVE it. It may be a gift for a special friend, if I can part with it.


Photobucket

Here is the backside...so cute (and no, that is my dressform Bessie...not me - oh how I wish I had her adjustable proportions depending on my mood and the outfit).

Photobucket

And the reverse...so sweet!


Photobucket

Now this one is "my" apron. I made it holiday festive, but really, I could wear it everyday (if I actually cooked). It is reversible, has two wonderful pockets for hankies, phones, lists, spoons, etc. I wore it to Jen's most recent holiday show in fact. She had hers on too, and I so wish I had a pic...she was completely adorable!


Photobucket

So this is the thing that makes Betsey super unique...the removable side bows. They give so much drama and cuteness to the back of the apron. Whether you are wearing jeans or a little black dress, these bows will flatter, minimize, and be a walking conversation piece as you serve champagne and hors d'oeuvres.


Photobucket

This apron is my favorite of all time. It is a gift for Lou's kindergarten teacher, who is completely wonderful and I suspect at some point will be nominated for sainthood. I mixed two of my very favorite prints (Amanda Fleur from Pretty Please, and Maeve from Queen Street).


Photobucket

I added one pocket, and personalized it with her initials (so I wouldn't hoard it for myself). Whether she is doing major holiday cooking at home, or just shielding herself from kindy art supplies, I know she will put this apron to good use!

So now on to the gorgeous tester creations...they didn't have much time given the fact that we wanted a mid-December release, but they outdid themselves with time to spare!


Photobucket

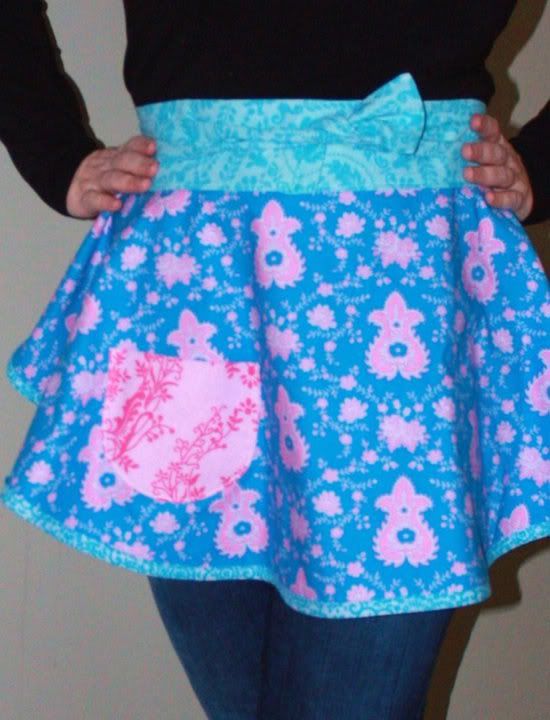
First up is Cathy's gorgeous daughter in her apron...she is cute (and the epitome of fun and sweet) the Madeline print!

Photobucket

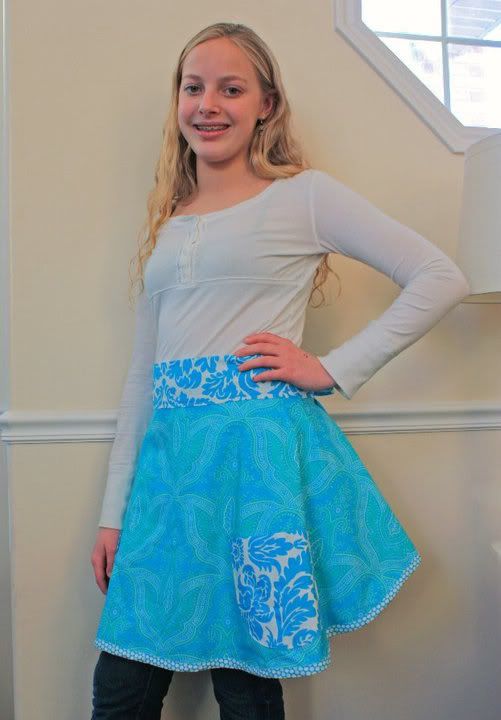
Heather's apron is completely gorgeous...her sewing is meticulous, just like her embroidery designs!

Photobucket

And here is Jeanne's version on her gorgeous daughter. I'm pretty sure that I know Miss J's tastes in colors and prints, so that apron may be a keeper rather than a gift ;)!

Photobucket

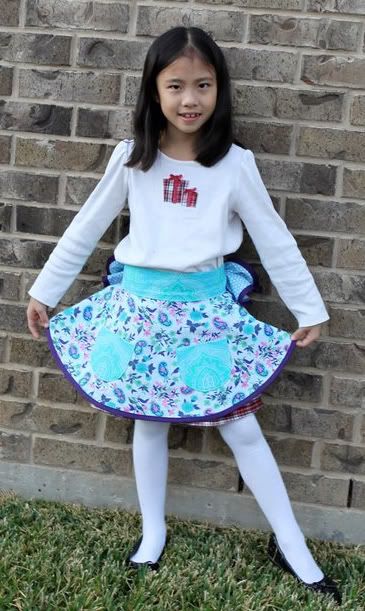
Here is a very adorable representation of the little girls' version. Her mama Jenny is a great seamstress, and I had the privilege of hanging out with her sweet family when I went down south for my class reunion. Please don't let the very green grass distract you from the great apron and the beautiful child. We all need to pick up and move to Texas!

Photobucket

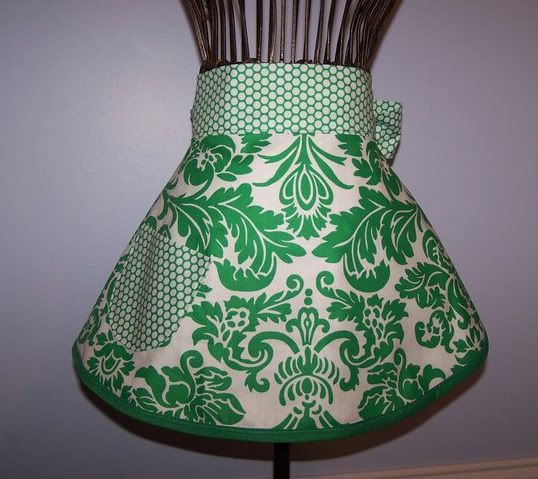
So loving Jessica's version - crisp and perfect, just like everything she creates!

Photobucket

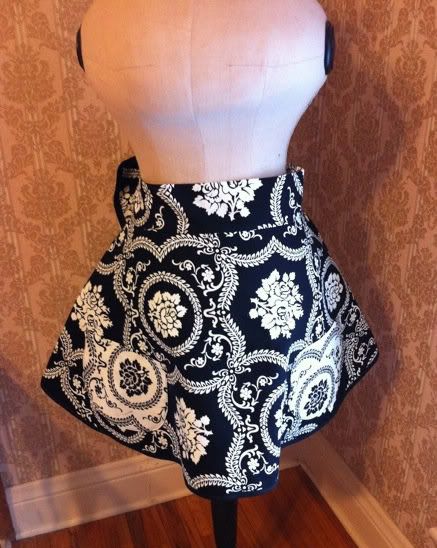
Swooning over Marlo's chic black and white apron....she knows what her mama loves (though I did score you some rare red and white stuff ;) )!

Photobucket

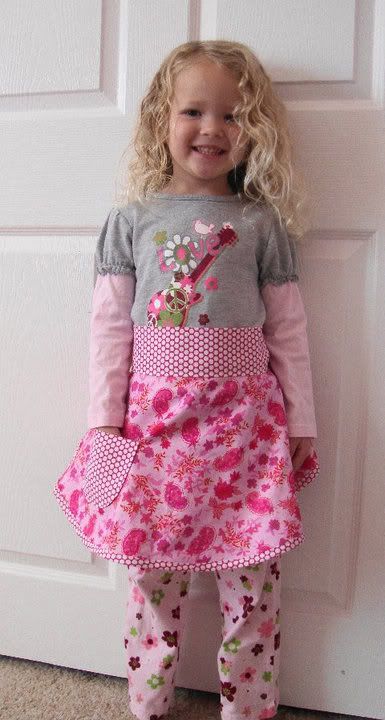
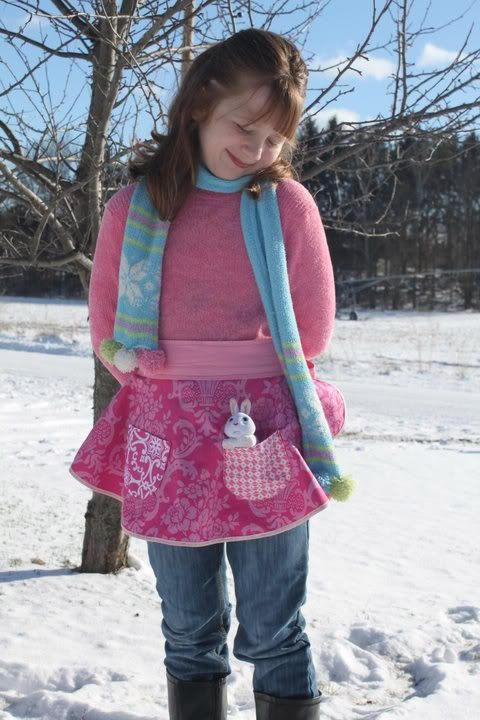
And here is precious little Ms R. in a super pink little girlie apron!


Photobucket

And how fun and cute is this? Little miss L. made snow ice cream in her apron, and she couldn't have been cuter!


Ok, one more and I will stop (I hope)...our girl Jenny made a gorgeous apron and blogged it here. You need to follow her if you don't already (she has awesome taste and is absolutely hilarious)!


Soooooo.....time for my 100th post giveawway! All you need to do is write in a response and tell me the one pattern you would like as a present. The first 15 people to respond get their pattern of choice....so easy! I've been blogging for two years now, and I know I should have at least 6000 posts, but dangit, this is a real milestone for me. I am not a super social person, and I only blog when I really feel like my thoughts will enhance your life in some way. Hopefully I am crawling out of a major creative lull, and I will post more of merit in the new year!

WOW - that was fast!!!!

I've emailed patterns to everyone with a visible address. I still need addresses for:

Craftmom
Jennebeker
Sahmy
Angie
Tracey

Contact me at info at scientificseamstress.com and I will get those sent your way!


Wednesday, November 24, 2010

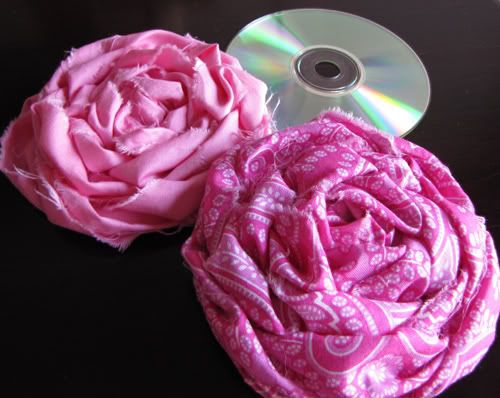
CD-ROM Rosettes

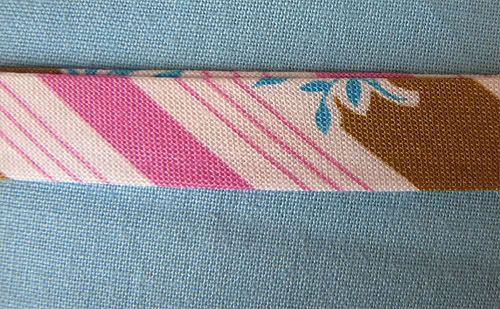
Remember about this time last year when I went on my Frayed Rosettes bender? Well, the snip/tear/roll urge has hit me one again, but this time I wanted to do something even larger, grander, and...ummm...less labor intensive (hey, my house is on the market..a lot of my energy is spent swiffering dog hair and firing up LED tealights for showings). Anyway, I came up with something fun, fast and completely giftable (my mom is in town and she says so...the prototypes are already in her suitcase, so that is a good sign)!

Photobucket

All you need to make these big, beautiful rosettes are 1) an old, scratched up CD, 2) about 1/4 yard of fabric and 3) a hot glue gun.


Photobucket

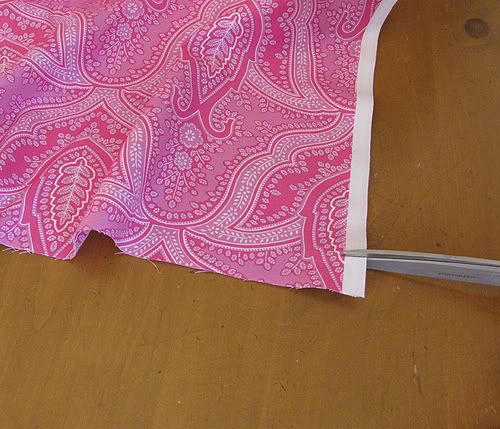
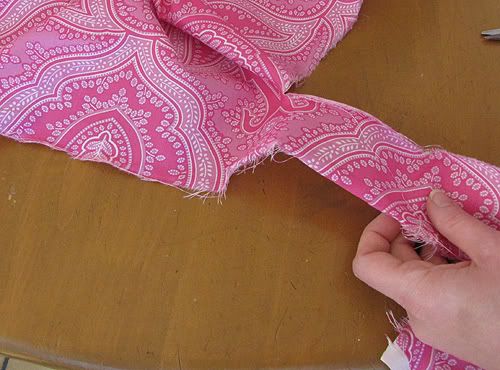
For the demo, I used gorgeous, hot-off-the-press pink Maeve from Jennifer's Queen Street line. To start out with a nice even torn edge, you will need to snip an inch or so above the cut edge, then grasp either side of the snip and tear (for more details on snipping and tearing, download the Frayed Rosettes tutorial).


Photobucket

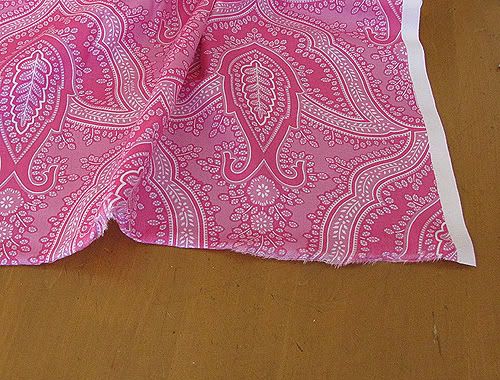
Once you have this edge, you can start tearing off the components for your rosette.


Photobucket

Make your initial snip about 1/2" from your torn edge and rip.


Photobucket

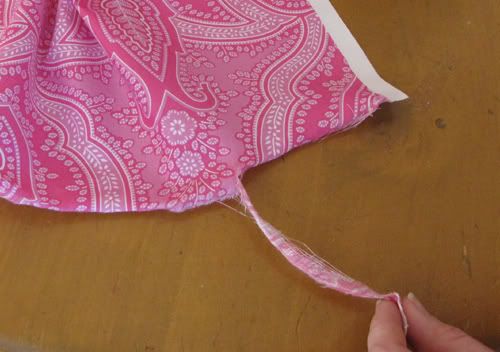
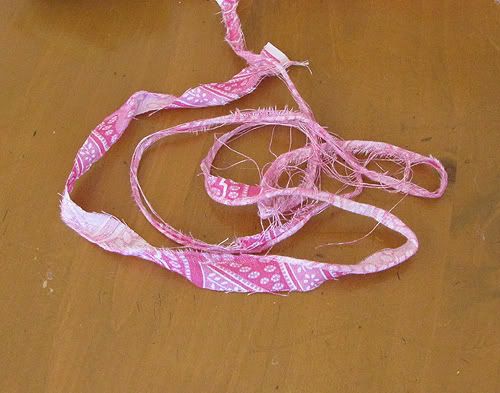
This will give you a thin, stringy piece.


Photobucket

Then snip and rip about 2" from the edge. Repeat.

At this point you should have one stringy skinny piece and two wider pieces.


Photobucket

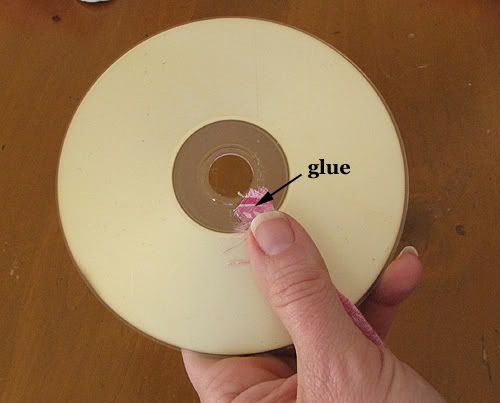
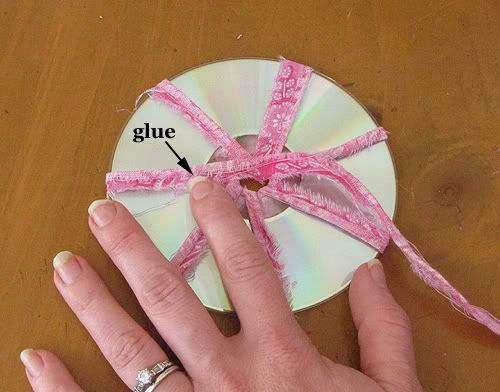
Squirt a drop of glue near the center of the CD, and stick the end of the stringy piece into place as shown above. Normally, I would give you hot gluing action shots, but my glue gun is a hot mess! So I'm substituting with arrows...they indicate where the hot glue should be applied.


Photobucket

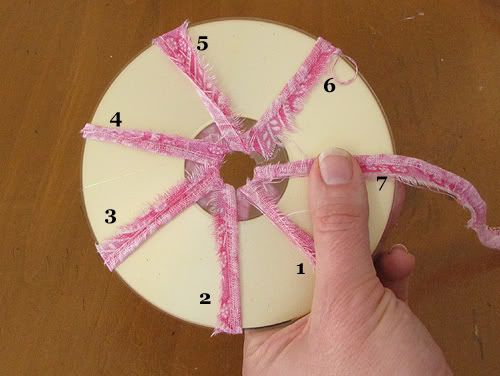
Bring the stringy piece through the hole so you have exactly seven wraps (no more, no less).


Photobucket

Flip the CD over to the other side and glue the stringy piece into place and trim. You should have exactly seven wraps on that side too.


Photobucket

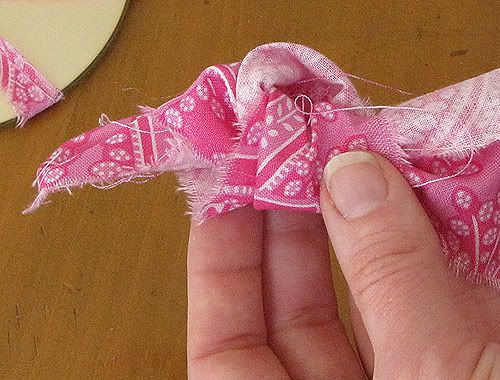
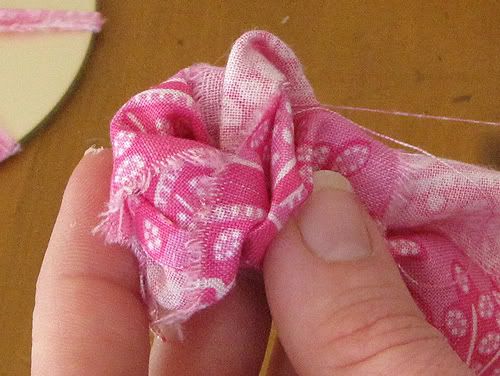
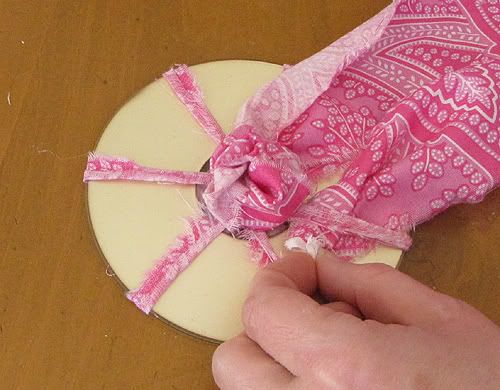
Tie the end of one of the wider strips into a loose knot.


Photobucket

Tuck the tail into the knot, and add a drop of glue to hold it in place.


Photobucket

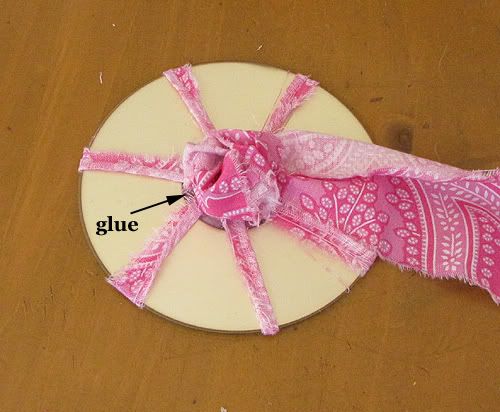
Glue the knot to the center ring of the CD.


Photobucket

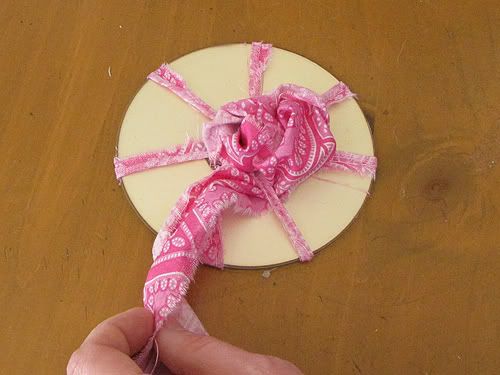
Now for the fun part! Weave the strip between the wraps (go over the first one, go under the next one, etc, etc).

Photobucket

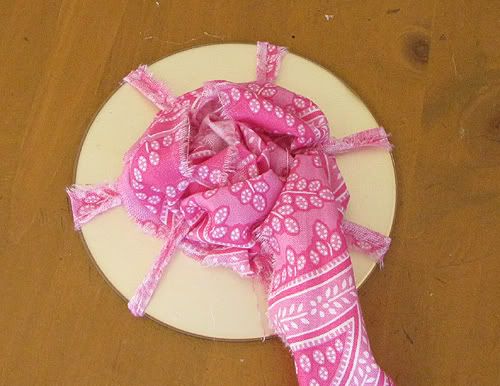
For best results, keep the material loose and fluffy for those first wraps, then gradually tighten up as you get further from the center. This will give a more authentic domed rosette shape.


Photobucket

Try to keep the wraps evenly spaced as you go along.


Photobucket

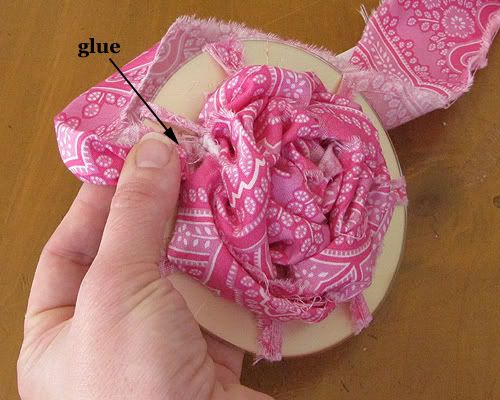
When the first strip runs out, tuck the end under the adjacent "petal" and glue.


Photobucket

Pinch the end of the second strip, and glue it into place right next to the end of the first strip.


Photobucket

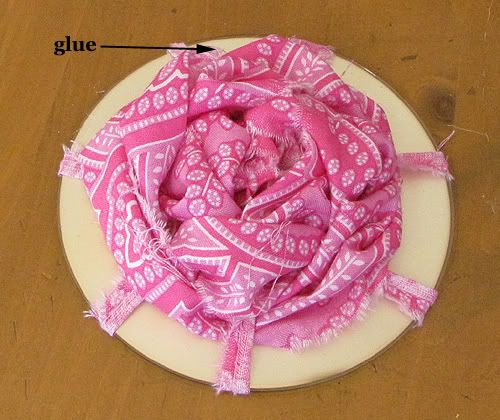
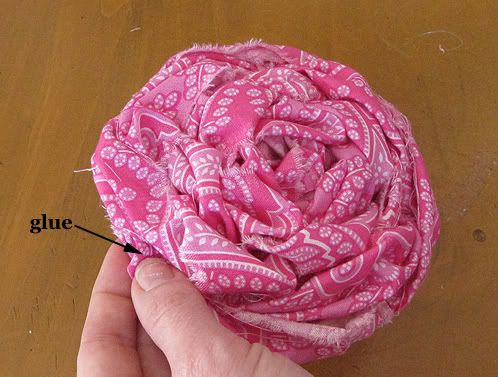
Weave this strip in and out until you get to the end. Tuck and glue the end into place. Arrange the outer edge petals so that they cover up any glimpses of the shiny CD. Glue wherever you see fit.


Photobucket


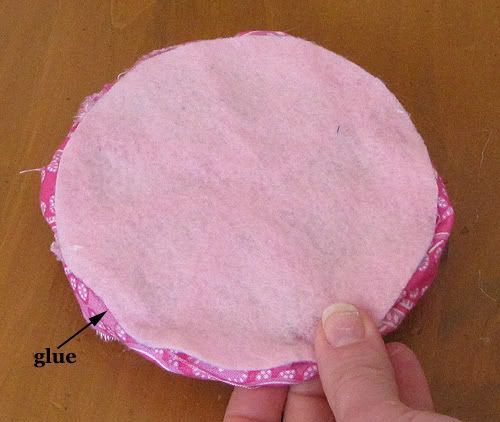
If you want to cover up the back, simply trace around another CD on felt. Cut the felt circle out, and glue it to the back of the CD.


That is really all there is to it...experiment with solids, prints...or even other materials.


Photobucket

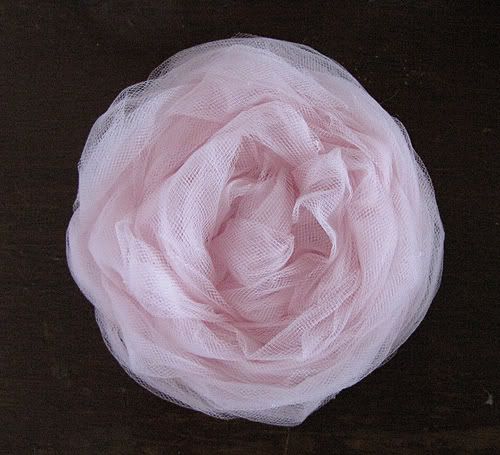
Here is a tulle rosette (I used 180" of the 6" wide tulle that comes on a roll, but I doubled it up to make the process go faster).


Photobucket

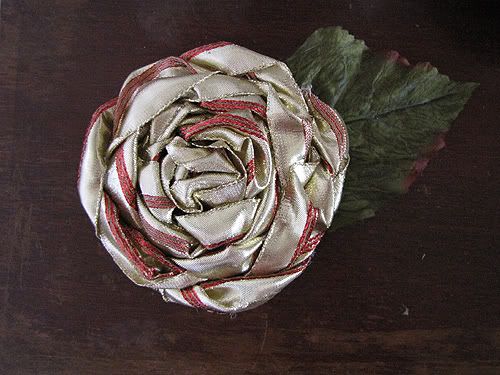
I also tried it with shiny wired ribbon (90% off bargain post-Christmas at JoAnn's last year), and it will make a beautiful bow alternative!

I'm plotting all kinds of things to do with these big, fun rosettes...make brooches, stick 'em on walls, use them as ornaments...etc!


Monday, November 15, 2010

Bias Tape Breakthrough!

I have bias tape on the brain because our next Sis Boom pattern requires significant amounts of it :) . I'm not ready to spill the design details yet, but I will share my recent personal progress in bias tape making.

Photobucket

Generally, when a pattern calls for bias tape, I just run out and buy it. Most fabric stores carry an array of colors and widths, and I can usually find something that works for the project. But for this project, I really really really wanted to use fun prints for the bias binding.


Photobucket

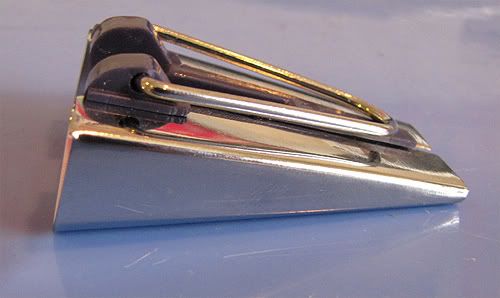
A few months ago, one of my sewing friends mentioned that I needed a bias tape maker. Well, I thought she was talking about one of those expensive automated appliances that cost about as much as a basic sewing machine. I filed it in my brain as a "maybe someday when I have more money in the bank and a really amazing coupon" thing. Turns out she was referring to a simple little notion that you can find in the quilting section of your favorite fabric store for well under $10! Pictured above is a 1" (25 mm) bias tape maker. It is perfect for making what is known as 1/2" double-fold (or extra wide) bias tape.


Photobucket

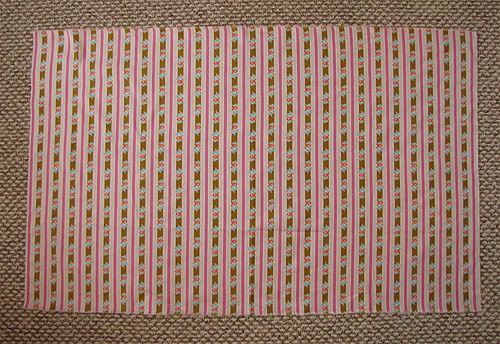
I'm going to take you through the bias tape making process from start to finish...don't worry, it won't take that long! I particularly love striped bias tape, so I used Siobahn from the Poodle line for this tutorial. The first step of course is to cut the bias strips. I'm starting out here with exactly 3/4 yard (27") of 45" wide fabric. I've cut away the selvedges, so it is more like 43" wide.


Photobucket

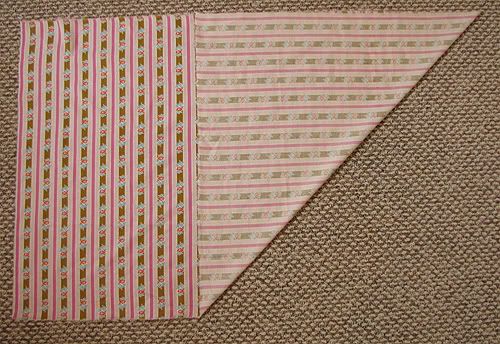
Fold one of the short edges up to meet one of the long edges. For best results, press the fold.


Photobucket

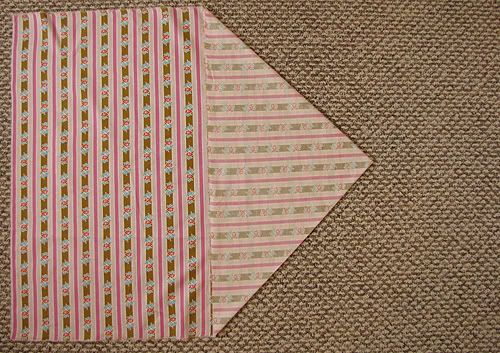
Next, bring the top and bottom corners together as shown in the pic above. Align the folded edges. Again, press the newly formed fold for best results.


Photobucket

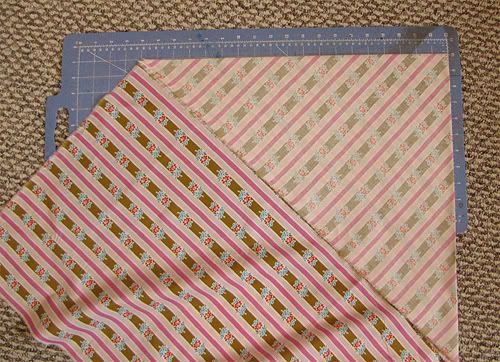
Now, place this most recent fold on your cutting board (which is hopefully larger and less defaced than mine).


Photobucket

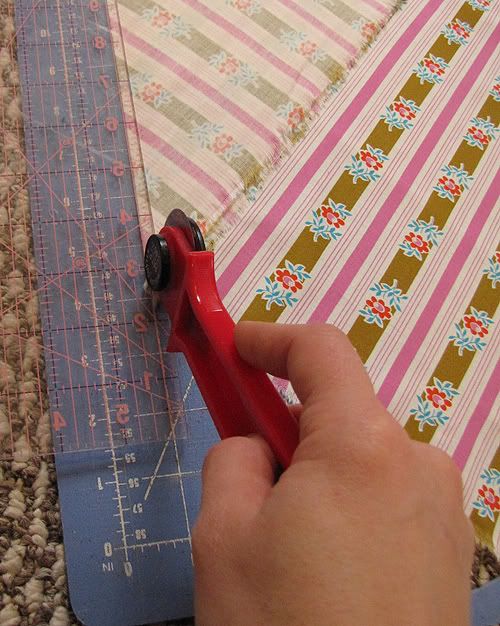
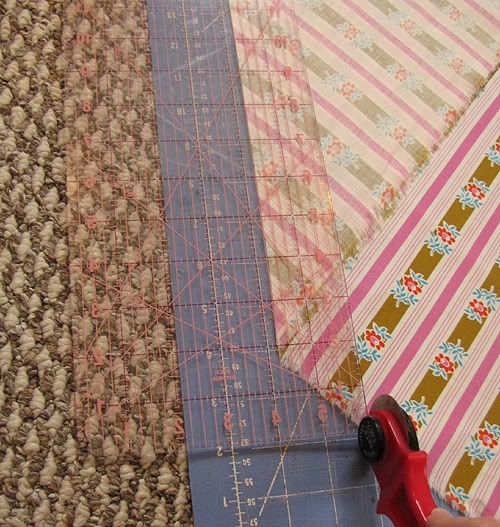
Use a rotary cutter and a clear ruler to cut off 1/4" beyond the fold. This will give you a nice straight guideline for cutting your strips.


Photobucket

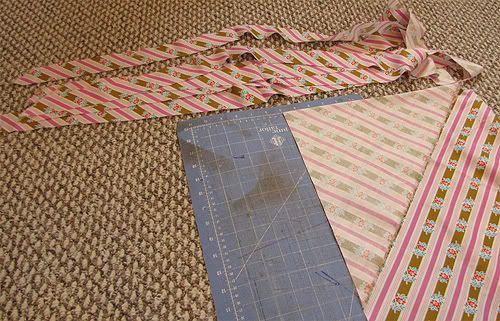
Cut 1.75" wide strips through the folded and single thickness layers. The first cut will yield two strips: one that is about 37" long and one that is about 34" long. With each cut, the second strip will get about 3" shorter, but the first will remain at 37".


Photobucket

Basically, you just keep cutting until you get enough bias tape for your project. Here is a little cheat sheet for a 3/4 yard starting rectangle (numbers are approximate).

1 cut = 71"
2 cuts = 139"
3 cuts = 203"
4 cuts = 263"


Photobucket

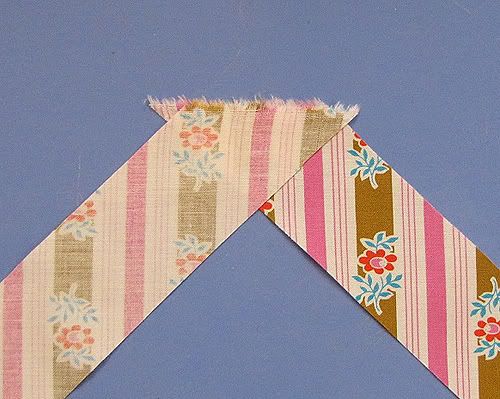
To join the pieces, put two ends together as shown in the pic above. If you can't get two ends to do this, try the other end of one strip. Make sure there are little dog-ears that are just over .25" long on each side.


Photobucket

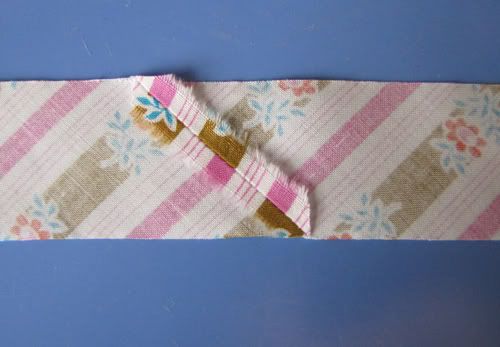
Stitch together, 1/4" the aligned edges. Press the seam open, and trim away any overhangs.

OK, so far I haven't discussed anything truly revolutionary. Now we are getting into the fun stuff...

The first time I tried using a bias tape maker, I was a little disappointed. I followed the manufacturer's instructions to the letter, but I kept getting uneven, wrinkly bias tape. Part of the problem was that I wasn't a very good "driver" along the tape and the folds were coming out very inconsistent. I couldn't really figure out the cause of the wrinkles, however. I did a little experimenting, and now I am getting picture perfect bias tape every time :) .

Photobucket

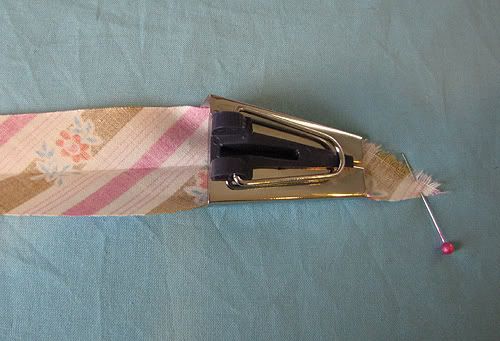
The uneven fold fix: If you are a wild driver like me, I highly recommend folding your bias strips in half lengthwise and pressing to create a crease. The crease acts as a guideline for drawing the fabric through the bias tape maker.


Photobucket

Insert the pointed end of the strip into the wide end of the tape maker. If needed, you can coax the fabric through the small end with the tip of a straight pin. It is a little hard to see in the photo, but there is an opening in the center top of the tape maker. As you make your tape, the crease should be visible in this window all times so that you get nice even folds.


Photobucket

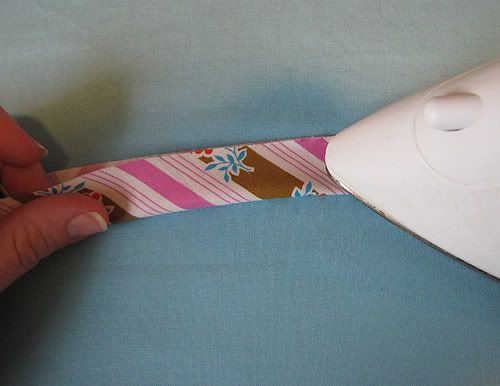
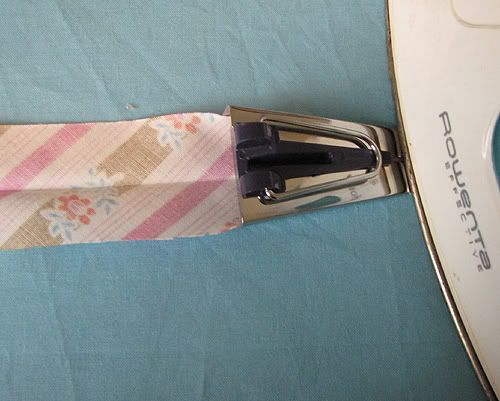
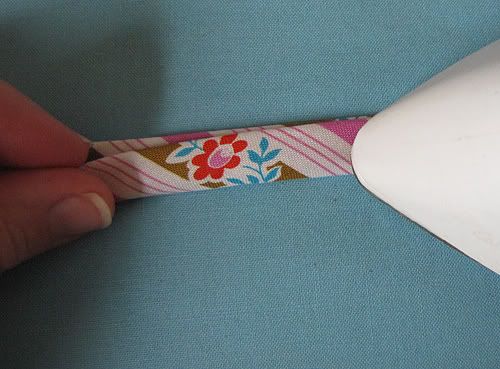
Now for the wrinkle fix: The illustration on the packaging shows the iron a few inches away from the short end of the tape maker (even though the corresponding text says to keep the iron close to the tape maker). I've found that the side of the iron needs to be smack dab against the tape maker opening to get nice flat tape. In fact, rather than pulling on the tape maker as shown in the illustration, I just use the iron to push the tape maker along the tape, and I use my other hand to keep the crease centered. It really helps to go slowly and use lots of steam.


Photobucket

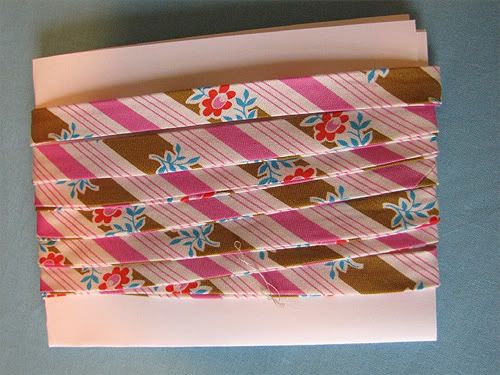
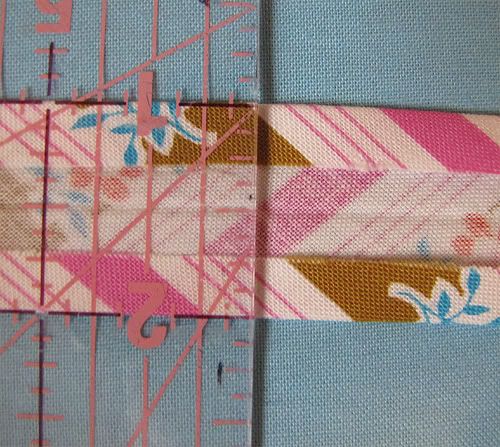
And here is the result - perfect 1" wide single fold bias tape with .25" folds!

But we want double fold, right?....

Photobucket

Easy - just fold in half lengthwise and press. Depending on how you will be using the tape, you can simply align the folded edges. However, if you want to make bias tape that is just like store-bought, make sure that one edge protrudes slightly (1/16 of an inch or so) beyond the other.


Photobucket

For a great explanation as to why store-bought bias tape is like this, check out Angry Chicken's hilarious and very informative video tutorial!