Thursday, December 31, 2009

The last half year according to the little camera...

We have a little Nikon Coolpix that sits on the windowsill in our kitchen. It isn't fancy, but it holds a battery charge like you wouldn't believe, and it is perfect for spur of the moment, must-capture events. Since hubby is a chef, it mostly grabs the "oh my gosh, this food is amazing and must be documented" type things. I just downloaded the last 6 months of pictures from it, and I see that we've also grabbed a few sweet family memories...


Del and Lou by the garden...all that remains is the chard, so it must have been pretty close to the end of the growing season. They are both barefooted, so it couldn't have been too cold yet.


Yep, it was pre-frost - the watermelon vines are still hanging in there.


Some sort of dumpling...they contained prunes or potatoes (or maybe both)?


Goulash - yum!


Snow!!! The little camera is great in adverse weather conditions, so out it went!


Good thing I married a guy from Upstate NY!


Even Big Buddy got into the wintry action...notice that High-Pro glow?


Enough of that, time to go in and eat and sleep.


This guy has his daddy's Northerner genes, I think!


Playing with the macro setting...


Not bad depth of field for the little camera, eh?


Inside and making rolls...


There is some special technique to knotting rolls, and Lou is a pro already!


Tada!

HAPPY NEW YEAR!!!!


Monday, December 14, 2009

Frayed rosette bib necklace tutorial

Bib necklaces are showing up everywhere this year! You can find them at high-end retailers like Antrhopologie, but the most amazing specimens I've seen are handmade and on 
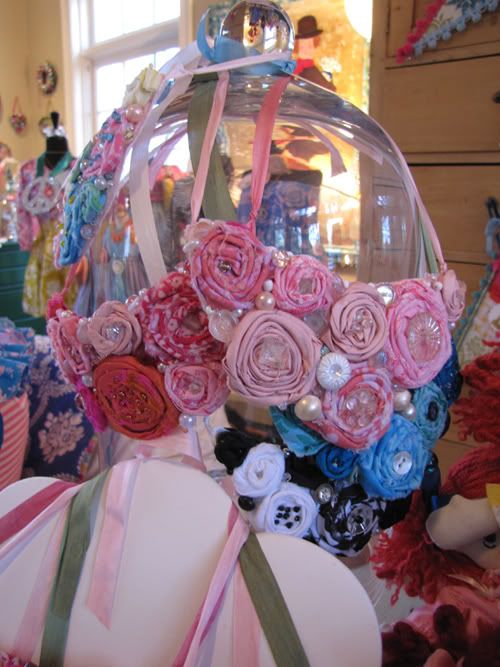
Etsy. Just search "bib necklace" and you will be treated to big, delightful statement necklaces made from all sorts of cool materials. My very favorites incorporate soft, rolled fabric roses and lots of sparkly embellishments.
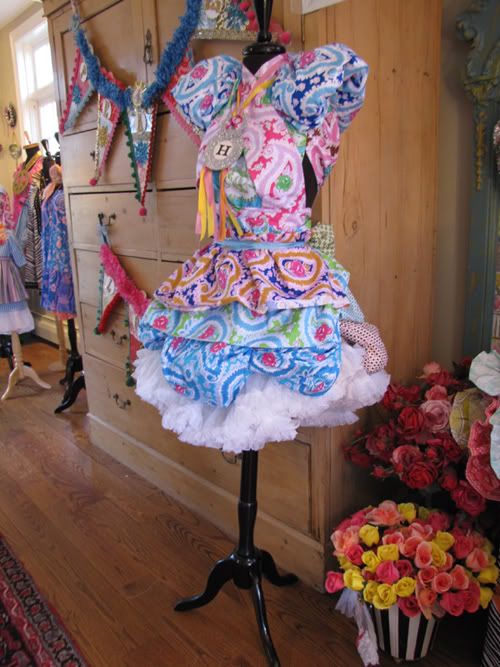


A few months back, Jennifer Paganelli asked me if I could make some blooms out of her gorgeous Sis Boom fabrics. We came up with a fun little technique and turned it into a tutorial, which you can download for free at 
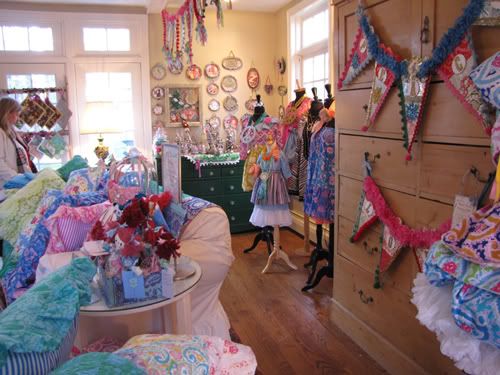
YouCanMakeThis.com. There are so many things you can do with these little frayed rosettes...attach them to hairclips, picture frames, magnents...you get the idea. Of course, they just scream BIB NECKLACE, so I decided that I needed to make a bunch so could 1) bring them to the Sis Boom show and 2) get this particular craft out of my system.


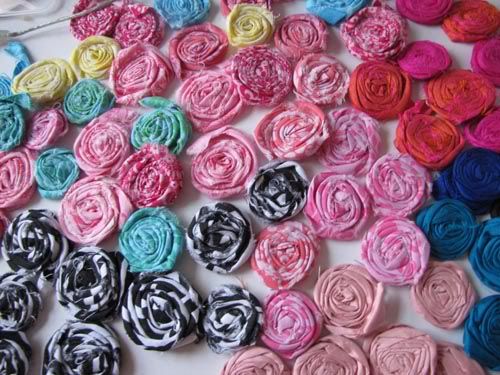
Since I was planning on making a dozen or so necklaces, I went ahead and made LOTS of rosettes. They don't take very long to make, and it is nice to have a "stash" to work from while creating. I used a mix of Sis Boom fabrics (mostly soft tonal prints, but I couldn't pass up the wild zebra stripe) and silk dupioni. The silk was very stringy, so it took a little more effort, but the resulting rosettes were so decadent. In addition to the rosettes, you will need:

Felt
Fabric-Tac glue
Thin needle and sturdy thread
Assorted beads, buttons, and baubles
Ribbon
Hot glue gun
A scrap of knit fabric


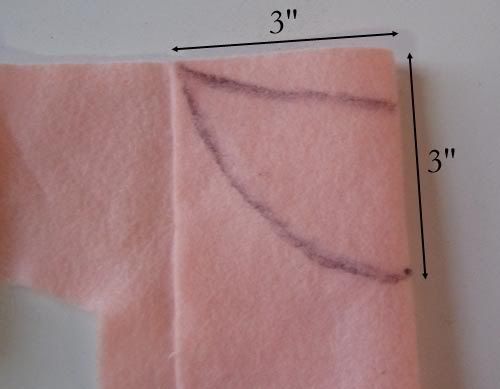
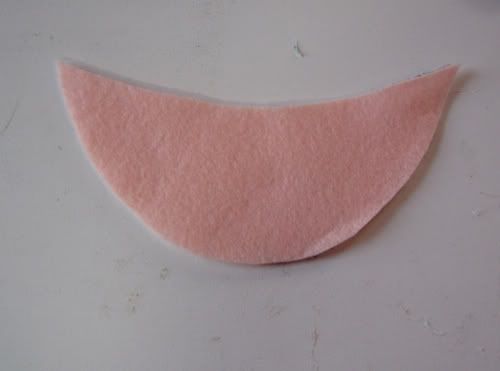
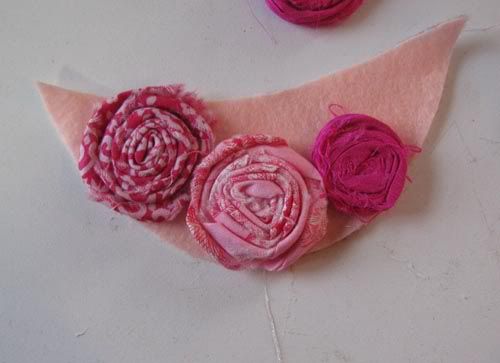
The first step is to cut the felt backing. I found a good, comfortable (yet still bold) size to be 6" wide by 3" long. I just folded the piece of felt in half lengthwise and cut half a crescent shape that was 3" wide by 3" long.


You can play with the shape on paper before you cut the felt...you might prefer something smaller, bigger, pointier, or even more asymmetrical. Just hold it up to your neck and see how you like it.


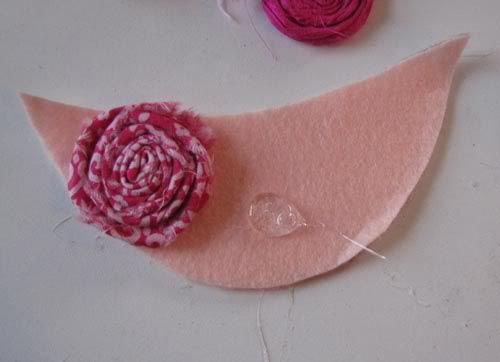
Now for the fun part...adding the rosettes! I like to use Fabric-Tac rather than hot glue at this point because it takes a while to set. I don't really have a plan when I start out, so it is nice to be able to move the rosettes around. Make sure to keep a warm, damp washcloth on hand so you can wipe off any glueblobs as that accumulate on your fingertips (those little boogers really stand out on black dupioni - ewww).

I made all of my rosettes pretty much the same size, but it adds so much more visual interest to use a mix of sizes.


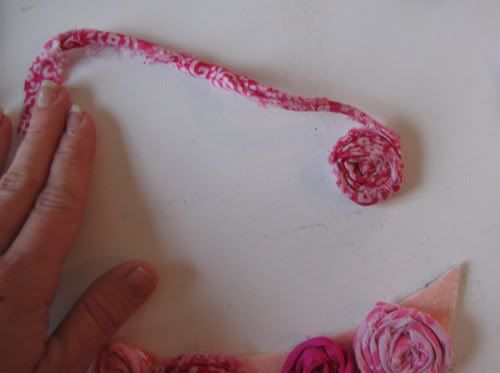
It is very easy to unroll the rosettes to make them smaller. Just unroll until you get the desired diameter, and clip away the excess.


The cool thing is that the excess can be re-rolled into a second small rosette!


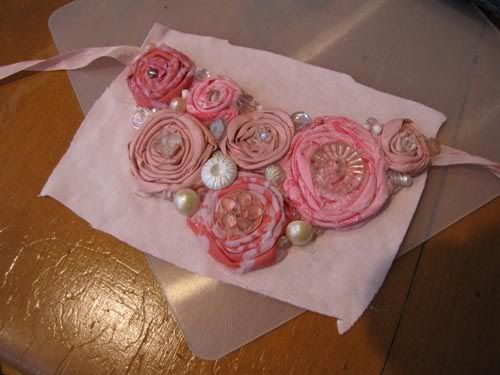
Glue the rosettes into place, covering as much felt as possible. Don't worry about small gaps between the rosettes, however. You can cover them with beads or buttons in the next step. Once you are happy with the rosette placement, let the glue dry.


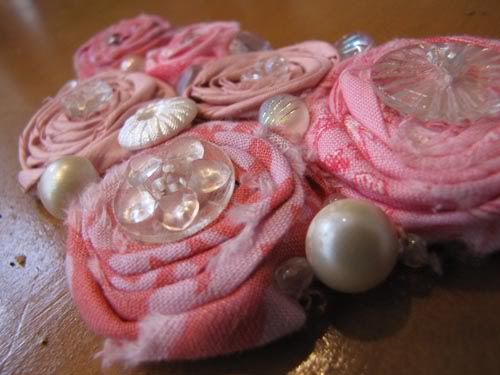
Now, grab your box(es) of beads, buttons, broken jewelry, etc., and start embellishing those rosettes! You could glue the embellishments into place with a very strong glue, but it is actually really nice to sit in a comfy chair and sew them . Plus, I just think the stitching gives a better feel and more durability to the piece. I also ran some extra stitches between the rosettes and the felt (out of sight) to really make sure the glued rosettes stay put.


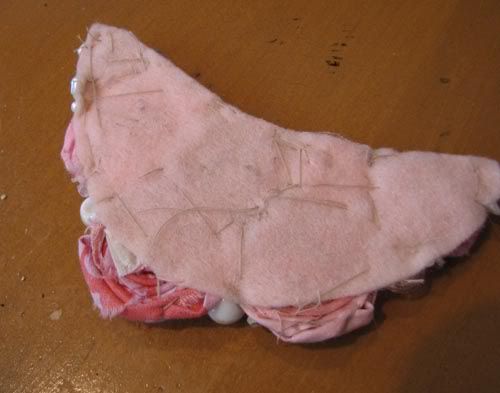
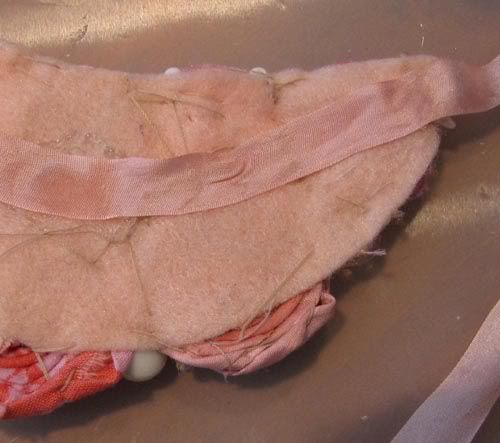
The back won't look too pretty, but that is OK because we are going to cover it up. First, though, we need to glue the ribbon to the back. I used silk ribbon because it is soft and nice and I have a ton of it. Satin or grosgrain ribbons would work well too - width and length are a matter of personal preference. I'd recommend starting with a yard and trimming down as needed.


Hot glue the center of the ribbon to the center of the backing.


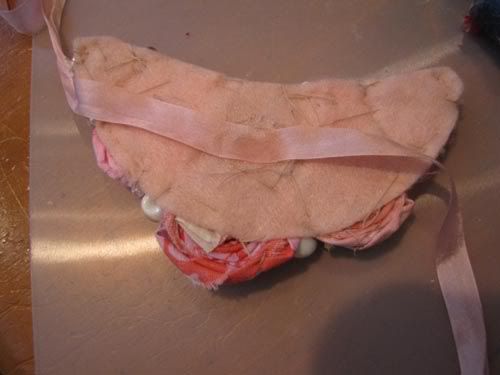
Make a line of glue from the center to the corner, and work the ribbon into place. Get it as flat and smooth as possible.

The last step is to cover the backing. I uses knit scraps for this because they are soft, flexible, and won't fray when cut. Cut a piece that is slightly larger than your backing.


With hot glue, it is always best to work in small sections. This prevents premature setting and massive burns. Squirt a bit of hot glue on one corner of the backing.


Place the knit fabric over the glue and gently press into place with your fingertips. When it is cool, pull back the fabric and apply glue to the backing. Repeat until the entire backing is covered with the knit fabric.


Check the edges to make sure the felt is attached securely. Do touch-ups, if needed. Also apply a bit of glue to any baubles or beads that seem loose.


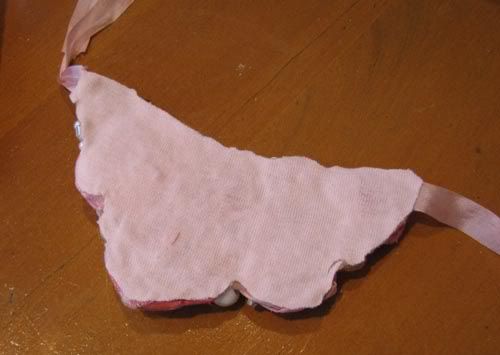
Trim the knit to the shape of the backing. If desired, tie some knots in the ribbon near the corners.


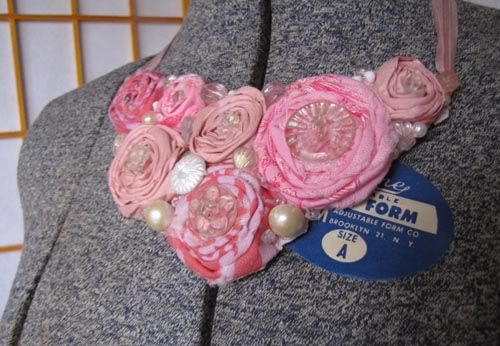
The necklace is ready to wear - simply tie around the neck! Can't you just see this with a little black dress or a v-neck tee? Here is an article that gives some great tips for wearing these fashion statements!

Wednesday, December 9, 2009

Ding Ding Ding! WINNERS!!!


The winner of the awesome GwynHug cards is #15, Margaret! She said:

What a cool idea! My overbuy was for a maternity coat I made when I was pregnant with my second child. It was going to be reversible and in fleece. I bought enough of each color to make both sides the same. I am still making things with my leftover fleece 4 years later!

The winner of the eBook of choice is Jen! Oh, I can so relate to her post, and it made me laugh out loud:

I recently bought flannel to make PJ pants using your easy fits for adults pattern. I bought 8 different flannel prints in 2 yard cuts. Ooops! I needed 3 yards and only discovered this after cutting out the first leg of the first pair. Arghhhhhh! So I went back to the online store I'd bought the fabric from, only to find out that one and one other had been sold out. I made a second order of the same available prints in 2 yard cuts again (because 1 yard would make half-pants-half-shorts :)..... I did repurpose that one leg of flannel into a scarf. Do you want a pink frog scarf? Just kidding. I received one-half of the online order. Still waiting on the other half. So I could make a bunch of one-legged pants or else have a sewing frenzy right before Christmas. The moral of the story (and an old adage from my carpenter father): Measure twice, cut once. And I'd add: Don't guess! I need those cards Carla.

Margaret and Jen - please contact me at info(at)scientificseamstress.com so I can send you your prizes!!!! Thanks so much to EVERYONE for sharing your great stories of fabric miscalculation!


Tuesday, December 8, 2009

Sis Boom FUN!

I had an absolute blast at Jennifer's Sis Boom Holiday Show last week! I got to spend almost two full days surrounded by fabulous folks, gorgeous fabrics, and bling-bling eye-candy galore!!! I really meant to get more pictures, but I got caught up in the whirlwind of fun!


The cutting table was stuffed just before the show opened. It didn't take those bolts long to thin out! I had the honor of cutting fabric for lots of amazing crafters, quilters, and decorators. I LOVED getting to play mix-and-match with such a huge, beautiful palette of colors and prints.


Shoppers got a sneak peak at So St. Croix live and in person. Jennifer's sweet assistant Madeline dolled up the dressform with some yardage and a poofy pettiskirt. There were only a precious few fat quarters of this line for sale at the show, but it should be available from fabric shops in January - yipeeee!


This was my view from the cutting table. I made the little rag dollies popping out of the box using a modified version of the in-the-hoop Mini-Kimmie from SWAK. The awesome potholders hanging up against the window were made by Nancy Geaney of Dark Horse Farm Designs. They sold like hotcakes!!! She also had some beautiful treeskirts and adorable stick ponies (yes, I'm kicking myself for not taking more pictures)!


I also made some frayed rosette bib necklaces for the show, and they were a hit (woo-hoo)! We have a free tutorial that shows how to make the single rosettes. I'm working on instructions for making them into necklaces, so be on the lookout for another tutorial in the next few days :) !


Finally, here I am with my sweet sewing buddy Nicole and her darling baby Hannah! She went away with some great fabrics and patterns...I can't wait to see what she makes! I'm donning my Meghan Peasant Dress, which was so comfortable and easy to wear that fabulously busy day! I'm also wearing my Kay Adams necklace, which I could have sold right off my neck a couple of times. It fit right in with the vintage beauty and sparkle that Sis Boom is all about!

***There is still time to win the fantastic "How Much Fabric" cards from GwynHug!***
Just leave a comment here before tomorrow (10/9/09)!

Wednesday, December 2, 2009

Must-have Scientific Sewing Resource (Giveaway)!

Have you ever been in a fabric store, spotted a bolt of pricey to-die-for good stuff, and thought "I'd love a shirt/pants/skirt made out of this, but how much fabric should I get?" You don't want to buy too much, because the $$$ can add up quickly at the cutting table, but of course there is nothing worse that NOT having enough fabric for your project. I usually err on the side of caution and overbuy, and that is why I have bins stuffed with wads of chenille, fleece, and wrinkled-up satin. Well, a group of amazingly bright, talented, and practical seamstresses have come up with a great solution for yardage conundrums:


The "How Much Fabric?" Reference cards by GwynHug are portable resource packed with yardage information for the savviest of fabric shoppers. I had the opportunity to check out a set of these cards and was blown away by how comprehensive and accurate they are. Over 2,000 patterns were used to generate all kinds of cool statistical data, which are presented in a cute, easy to follow format.


I cross checked the yardages from some of my patterns, and was thrilled to see that they were spot on consistent with the card set's recommendation. Even though I come up with the yardage charts for my own patterns, I can never remember how much fabric to get for a tunic, peasant, etc. Having these babies on hand takes out all the guesswork. In fact, I'm taking them with me to the Sis Boom Holiday Sale, where I will be working the cutting table on Thursday and part of Friday. If you are in the CT area, come see me and check out the cards in person!

*****GIVEAWAY******

You can win a full set of these great "How Much Fabric?" cards! Post one of your experiences with buying the WRONG amount of fabric (way too much or way too little). Come on, we've all done it ;) ! Next Wednesday, December 9th, I'll pick the winner of the cards by random drawing. The commenter with the funniest tale gets a free eBook of their choosing!