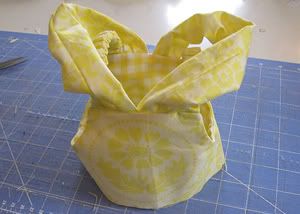
Ready for the next "princessification" of the Simply Sweet pattern? This beauty is a lovely yellow gown with off-the-shoulder swags and gathered peplum. These elements are very easy to add (despite the number of pics in this tutorial). Simple twists of the fabric give these elements the extra fullness needed to keep them light and poofy.
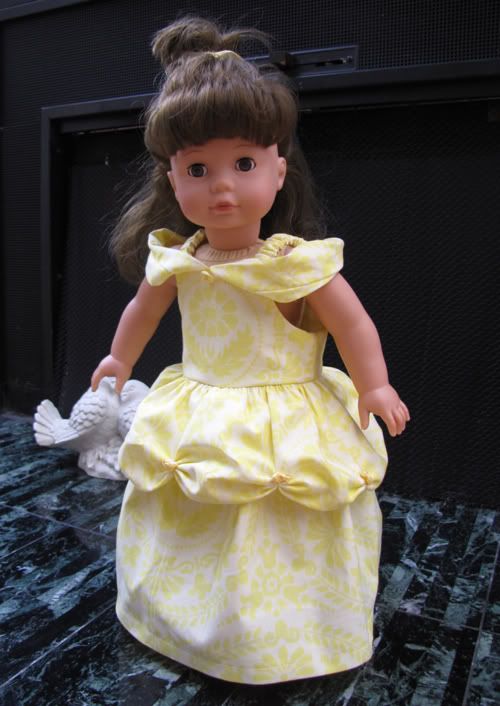
This dress is all yellow, which happens to be my favorite color :) . You could use multiple shades of yellow to add interest, or use a tonal printed fabric like the gorgeous Marie from Jennifer's Pretty Please line.
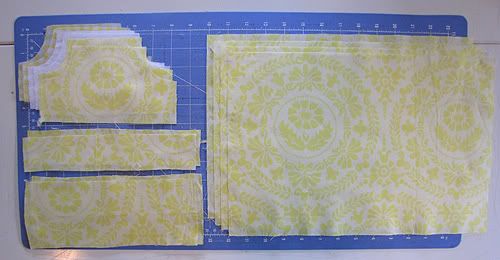
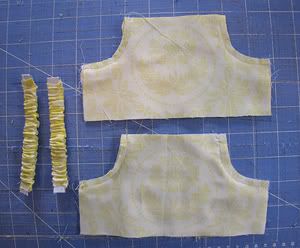
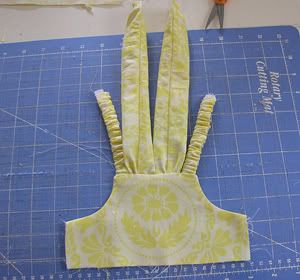
For this dress, I am using the jumper bodice (natural waist length option) with scrunched elasticized straps. Cut the pattern pieces as described. Also cut two strips that are the same length as your strap pieces, but twice as wide (bottom left on the photo below). These will be used to make the swags.
Using the charts provided, determine the dimensions necessary to make a skirt that is calf to ankle length. Cut the 2 skirt pieces as described. In addition, cut 2 pieces (same size as the first 2) for the peplum.
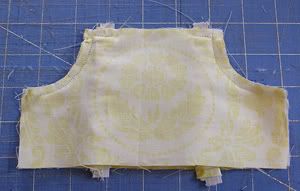
Sew the scrunched elasticized straps as described on page 13, and stack the bodice pieces and stitch the armhole edges as described on page 16.
Insert the straps into the front bodice as described, but only stitch the top edge at the position of the straps. The center should be left open for the swags.
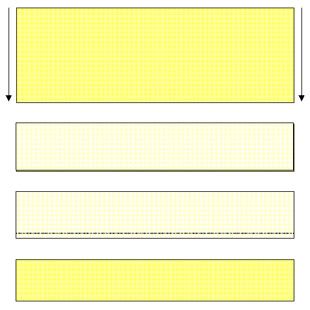
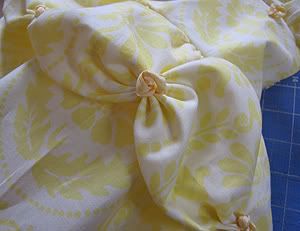
Make the swags by folding the strips in half lengthwise, right side facing in. Stitch 1/4" from the long raw edges. Turn the tube right side out.
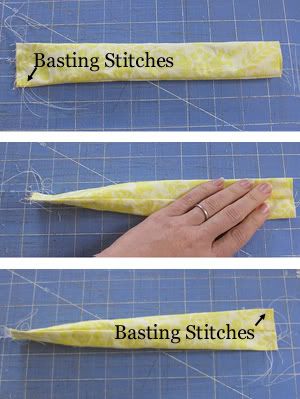
Run a two rows of basting stitches at one end of the tube. Open out the other end, and refold it so that the seam is centered on top. Maintaining this fold, run two rows of basting at this end. The swag should look like a tube of toothpaste at this point.
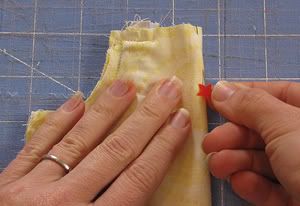
Fold the front bodice in half. Insert a pin through all layers at the center fold.
Gather the centered seam end of a swag and insert it between the the front and back layers, between the scrunched strap and the pin. Stitch into place. Note - I inserted my swag with the seam facing up, because I think it adds interesting detail. If you don't want the seam to show, just flip it over.
Repeat with the other swag.
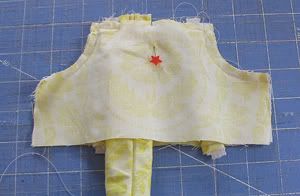
Stitch the swags into place 1/4" from the top edge.
Turn the front bodice so that the right sides are facing outward,
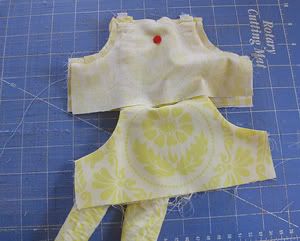
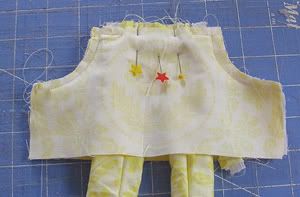
Move the swags out of the way for now. Insert the scrunched straps into the back bodice piece as described on page 18. Stitch the straps into place, but leave the center open as you did for the front piece. Fold and pin through all layers at the center.
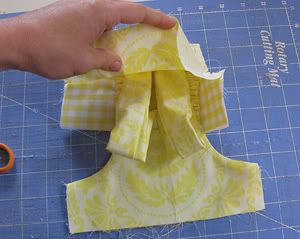
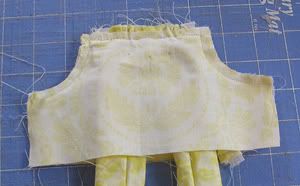
Gather and insert the other ends of the swags. The edges with the seams should be right next to each other in the center. Make sure the straps look like mirror images of each other at this point with no extra twists or turns.
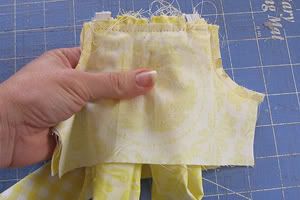
Stitch the swags into place 1/4" from the top edge.
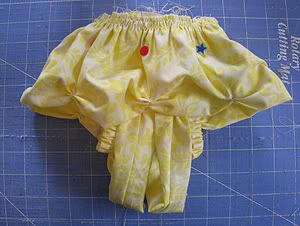
Assemble the bodice as described in the eBook. Notice how the swags stand on their own? That little twist makes a big difference!
Make the hemmed skirt as described as on page 45 and set it aside.
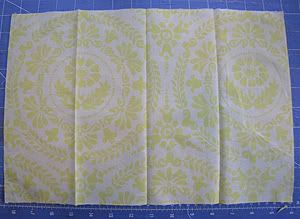
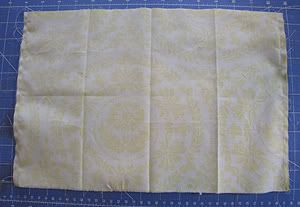
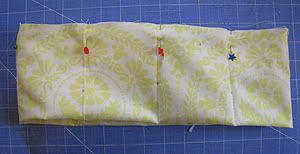
Fold the peplum pieces widthwise into 4ths and press to make creases.

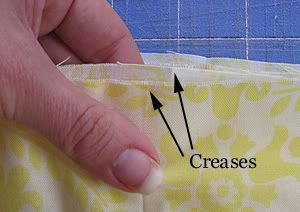
Fold the front and back pieces lengthwise with the right side facing in. Using a water soluble marker, make dots for the gathering points. Put dots on all of the creases, and right next to the side edges on the front pieces only. You can place all of the dots at the same height, or stagger them like I did. For the doll skirt, I made the front center marking 1" from the folded edge, and made the others progressively lower. For a "big girl" skirt, I would start at 2".
Place the front and back pieces together, right sides facing. Make sure the dotted ends are together. Stitch 1/4" from the short side edges. This will make a tube of fabric.

Fold the tube in half lengthwise, wrong sides together. Align the raw edges.
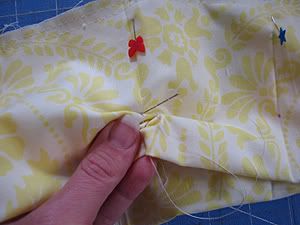
We are also going to work a little twist into the peplum so it is nice and full like the swags. At the top edges, shift the fabric so that the creases are 1/4" to 1/2" apart. Pin the layers together just between the creases.
Shift in the same direction at every crease and seam. Notice some poof forming?

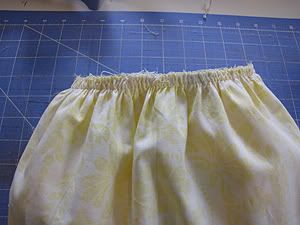
Run two rows of basting stitches at the top edge.
Now is a good time to go ahead and gather from the points to the folded edge. Using a hand needle and thread, make big stitches through both layers, which should be slightly shifted at that position. Use the thread to draw the fold up to the point. Secure the gather with several knots at the end of the thread.

Make the gathers at the other dots.
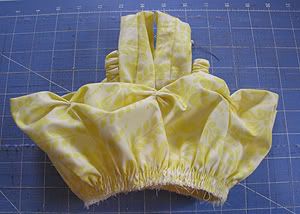
Pull the bobbin threads to gather the peplum and align the raw edges of the peplum with the bottom edges of the bodice. Arrange the gathering so that the seams and midpoints are in line.
Zig-zag stitch over the edges to "set" the gathers in place. Remove the pins and gathering threads.
Add the skirt as described on page 51.
Optional - add embellishments to the gathering points on the peplum, and between the swags at the top of the bodice. I made simple silk ribbon roses as described in this tutorial, but you could use pre-made ribbon roses, bows, or even artificial flowers.
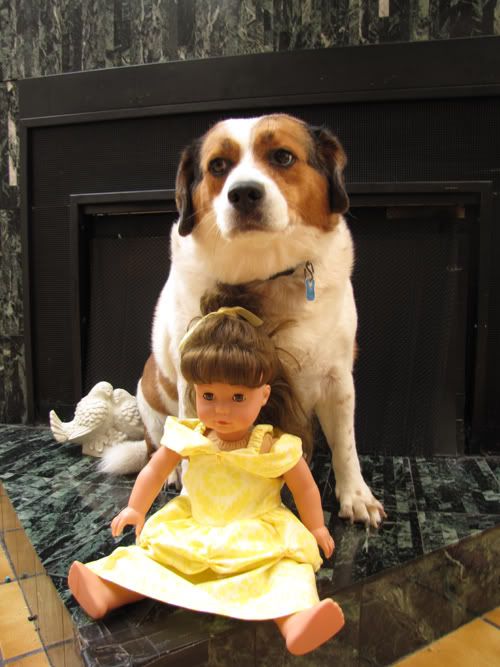
Now Beauty is all set for an evening with the Beast!
Doesn't Buddy look like he has a faraway romantic look on his face? He was actually eying my burrito over on the coffee table!