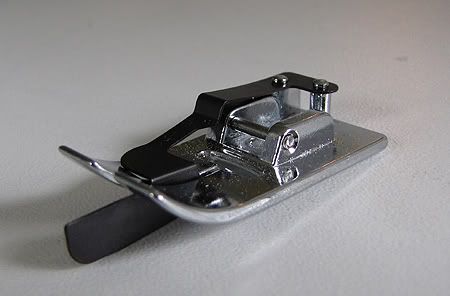
The blind hemming foot has a blade in the center that makes for perfect alignment during the stitching process. It is also great for edgestitching!

I'm going to demonstrate blind hemming using Jennifer Paganelli's gorgeous Lee Paisley from the So St. Croix line. I finished the raw edge using my serger, but you could also zig-zag stitch or even make a 1/4" fold.
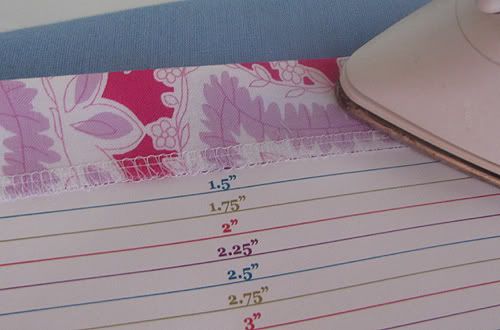
Fold the hem to the desired width. I'm using my handy dandy cardstock template to make a 1.25" fold. Up to this point, I haven't done anything differently than I would for a regular straight stitched hem.
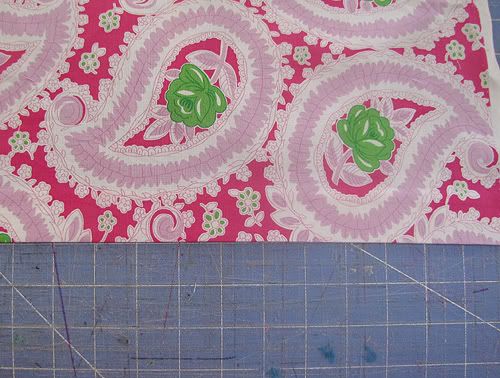
Lay your fabric out with the right side facing up and the bottom folded edge pointing towards you.
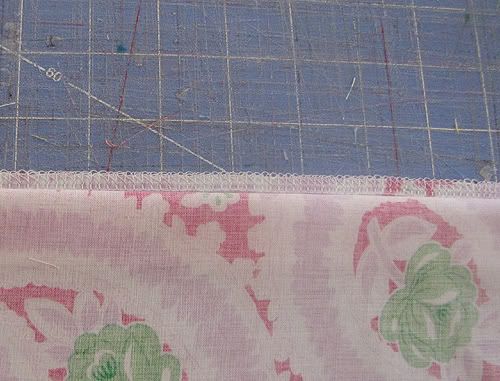
Lift up the top edge of the fabric up and pull it towards you, making a fold that is about 1/4" from the finished edge (note: if you made an initial 1/4" fold instead of edge finishing, this new fold should be in line with the raw edge).
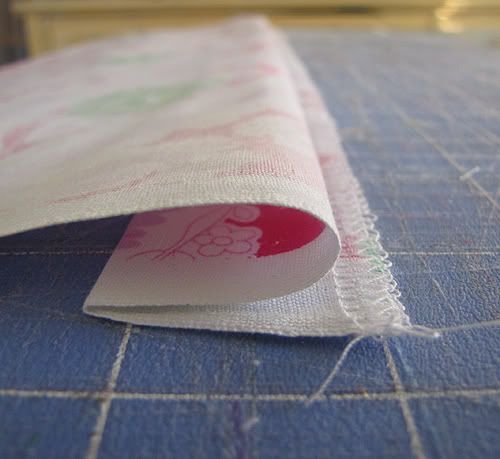
Here is a side view - the fold makes a Z shape.
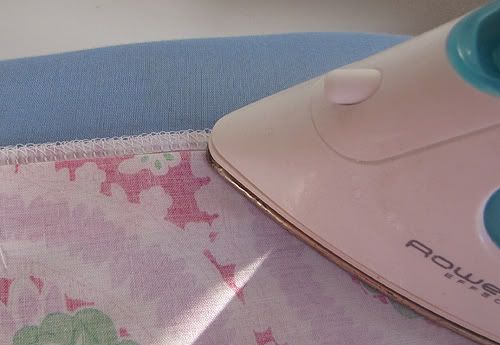
Press to set the fold.
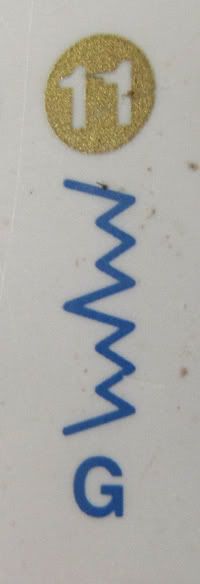
Put on your blind stitching foot, and set your machine to the EKG looking stitch shown above. The width and spacing of this stitch can be adjusted, and depending on your machine, you may be able to adjust the needle position in this setting. Before you hem your garment, optimize on scraps to get the stitching as invisible as possible.
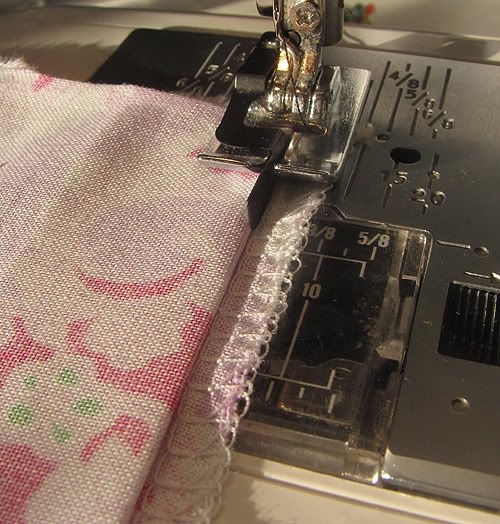
Put the fabric under the presser foot, lining up the blade with the top folded edge. Stitch along, keeping the blade flush with the fold.
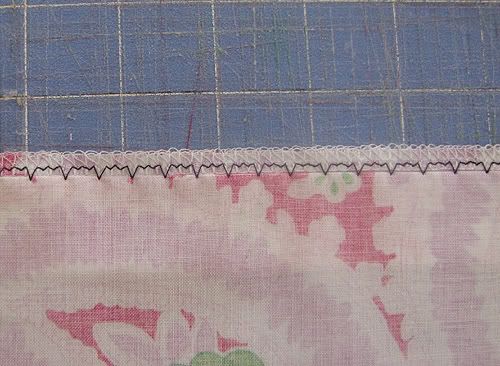
Most of the stitching will be about 1/8" from the outer edge (or outer fold, if you made an initial 1/4" fold), but every few stitches the needle will jump over and "catch" the material at the fold.
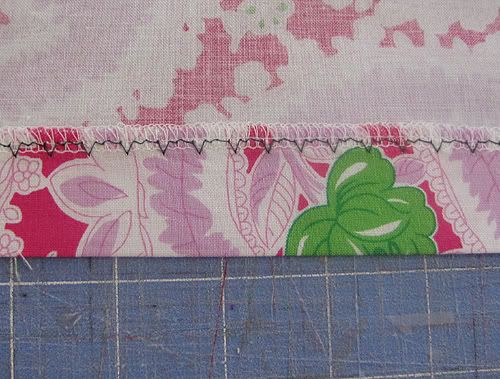
After flipping the fold back and pressing the hem, this is what the wrong side will look like...
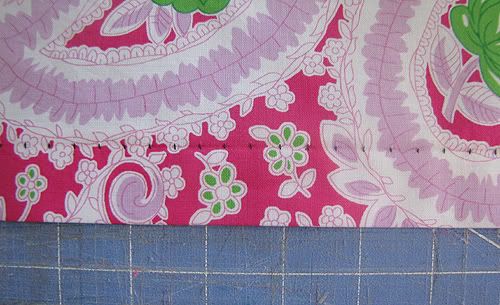
...and this is what the right side looks like! Keep in mind I'm using contrasting thread - matching thread would be much less noticeable.
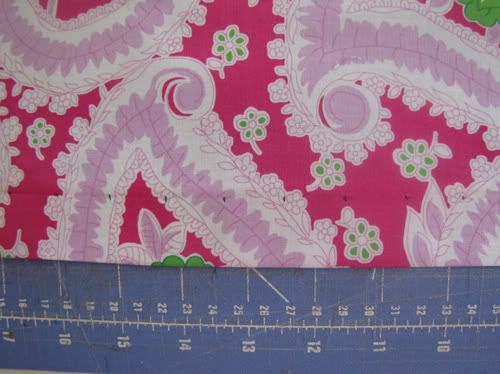
Here is a hem using a longer stitch length - even less obvious! The goal is to get as little thread as possible showing on the outside, so definitely play with your stitch settings. With thick fabrics like wool, the stitching might not show at all because the needle can catch the fibers without going through to the other side.
For more info on hemming and garment sewing in general, head on over to the Sew Mama Sew Blog. And be sure to leave a comment so you can win some of those great prizes!

14 comments:
This is so fabulous! Thanks for the step by step pictures! I have about 6 pairs of really nice dress slacks that I've been wanting to do this hem on. 2 of them have lining which may be more tricky, but I think I am definitely ready to try it now. Thanks again!
well, it makes sense now! Thanks so much!
and why is it I never understand until you describe it step by step for me?
You're a gem, Carla! Thanks so much!
I need this! Where can I order one?
Fantastic tutorial! Thank you so much for the step by step detail. That makes the process so clear for a newbie like me.
Thank you so much for sharing this! I had no idea how to do it, and the step-by-step pictures are so helpful!
I have wondered how to do this for, hmmmmmmm, let me think....since middle school....1979. Wow! I can finally go to bed tonight actually knowing how to blind hem stitch. I am thrilled to pieces!!! Thank you soooo much Carla!!!!
Thank you SS!
~Noel
I'm visiting from Sew Mama Sew. Thanks for the great tips - I'm a new follower and subscriber!
I love the blind hem stitch and attachment and have been using them for years. Good tutorial and I will try pressing the fold to see how that goes. When I cannot find a thread that blends well enough, I often use the nylon threads, either in smoke or the clear. I have had absolutely no problems with pressing the hems. I do recommend loosening the upper tension a bit to prevent stretching.
Where was this three months ago when I was folding an index card in an attempt to figure out blind hem?? :) Thank you so much for the pictures. Any chance you can explain a rolled hem next? I have three different rolled hem feet and not a clue how to use them.
Hi Carla,
I stumbled upon your blog the other day and am glad I did. I love your blog!!! It's funny you are a molecular biologist, I work in a microbial ecology lab that specialize in molecular techniques! I love to meet fellow scientists that sew! I think it's great you've gotten into pattern drafting. Your patterns are absolutely fabulous. I too have blog www.tenthousandsewinghours.blogspot.com and hope you would stop by. I look forward to your future posts:)
This is excellent!
Thank you so much!
I knew, in theory, how do use the blind stitch foot already... but it made no sense. These pictures are so pretty, and more importantly, clearly show the process.
Great post, thank you <3
thank you thank you thank you! I need to hem some dress pants, and I think this tutorial will help me tremendously! Thanks!
Post a Comment