Sunday, May 24, 2009

As the garden grows...

Photobucket

I've been hard at work on the Patricia Tunic this week. As I grade each size, I sew one up, tweak the pattern, then sew another one just to make sure all is perfect. Luckily, I have lots of friends and family members who are more than happy to share measurements and feedback in exchange for a tunic made from gorgeous SisBoom Fabrics . My vintage dressform Bessie has been helping me out tremendously. She is just like me - goes up and down in size and spends most of her time in the sewing room :P . Anyway, I thought I'd get the both of us out in the garden for some fresh air and some pictures.

Photobucket


Photobucket


Photobucket


Photobucket

Please ignore the weeds. I had big plans for weeding and mulching this spring, but I just didn't get around to it. I kind of dropped the ball with the veggie garden, too. The executive chef of the household had to take over as head gardener. I can't very well have dirty fingernails when I'm taking step-by-step sewing pictures, right?

Photobucket

The little guy is lending a hand as well. Right now his favorite job is holding the bowl while I pick strawberries. I think he consumes about 50% of what I harvest, but I'll take all the help I can get! Hopefully we will have enough for strawberry shortcake tonight :) .

Photobucket


Tuesday, May 12, 2009

Very exciting news!!!

I'm very happy to present the Sophie Tunic, the first of many SisBoom Patterns co-authored by me and the fabulous textile designer Jennifer Paganelli!

Photobucket

Yes - I'm working with THE Jennifer Paganelli!!! It is a dream come true! I've been a fan of Jennifer's gorgeous fabric lines for years. Her bold designs and vintage flair really speak to me and are perfect for the styles I love to create. If you've never met her, check out her blog and you will quickly see what a sweet, talented spirit she is. When I found out she was hosting a workshop just a few states away, I just had to go! My wonderful husband drove me up there early on a Saturday morning (through NYC in driving rain no less), and entertained Lou while I basked in Jennifer's creativity. She was so wonderful and easy to talk to, I felt like I had known her forever! At that point, I had no idea what my next pattern was going to be, but she sent me away with a gazillion new ideas. Now I have the huge honor of bringing her stylish clothing designs to life in pattern form, using her incredible fabrics and creative direction.

Photobucket

The Sophie Tunic was so fun to work on! We made it in a wide range of sizes - 6/12 months to 11/12 years. This style works for so many different ages. The little girl sizes are of course as darling as can be, and the tweens really love them too! The tunic can be made from a single fabric, or with contrasting facings and/or cuffs. A dainty loop/button fastener or ribbon ties can be added to the keyhole neckline.

Photobucket

There are lots of sleeve options, too! Three separate sleeve patterns are provided for each size: a short sleeve, a long sleeve, and a cuffed sleeve. The short sleeve has an additional cutting line for cap length. The long and cuffed sleeves have multiple cutting lines to make a range of lengths from ¾ to full.


Photobucket

Like the sleeves, the bodice can be made in a range of lengths. Shorter tunics are great with jeans and shorts, while longer tunics are perfect over leggings. Tunics make great beach or pool coverups, too!

Photobucket

Recognize the little blond standing between the models??? We were lucky enough to go "on location" with EmilyKorff, the outstanding woman behind the lens at Veralana Photography. She and her adorable girls did such a beautiful job showing off the design possibilities for the Sophie Tunic. Jennifer and I just couldn't be more thrilled with the pictures!

Finally, I have to send a HUGE thank you to my team of testers!!! This great group of women (and one man) gave me so much encouragement and input to make this pattern the absolute best it could be. Not only did they test out the patterns to check for accuracy, they proofread and helped me to clarify the instructions where needed. Their hard work is so greatly appreciated! Of course, the best part of it all is seeing the pictures of their beautiful daughters beaming in their tunics!


Photobucket

The Sophie Tunic is available for download at YouCanMakeThis.com . If you've never worked with an eBook before, get ready for a treat! The instructions are very detailed - every step is illustrated with a diagram or a photograph. The pattern pieces are printed and taped together to make durable, full-sized patterns. Plus, you can print out the sizes you need when you need them. You can make gorgeous tunics for all the little girls in your life (and pretty soon you be able to make them for big girls too :) )!

Thursday, April 30, 2009

On edge...

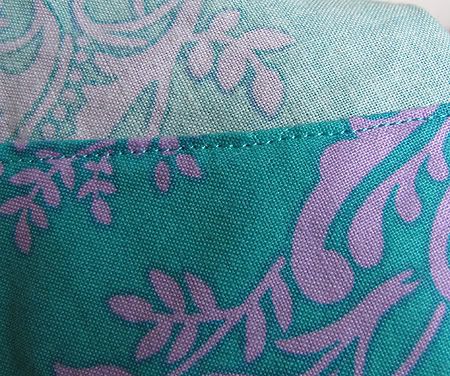
Topstitching is one of those things that can either make or break a project. It adds so much durability and detail to a seam, but it must be straight and even to give a nice finish. I usually topstitch 1/8" from an edge or seam. Edgestitching is topstitching that is even closer to an edge or seam - more like 1/16" . The pattern I'm working on right now involves edgestitching at the hems, neckline, and facings. It gives a very professional finish, and isn't any more difficult than topstitching.

Photobucket

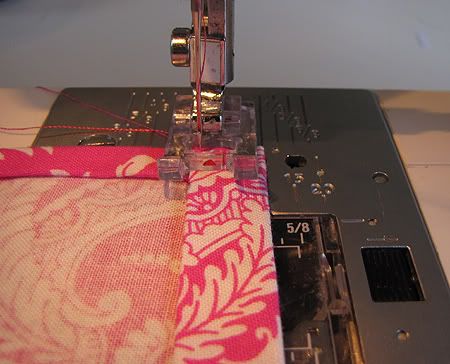
Edgestitching can be done with a basic sewing machine foot. I've been using my clear one because I like to see what is going on with the fabric under the foot. It is just a matter of finding the proper needle position, a reference point for the edge on the foot, and keeping the fabric in line and feeding evenly.

Photobucket

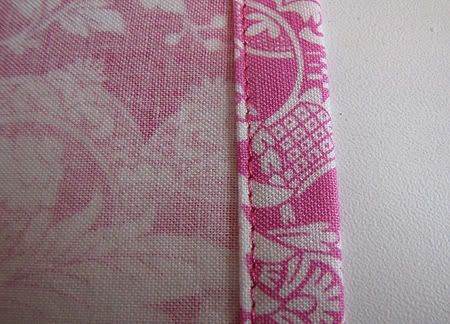
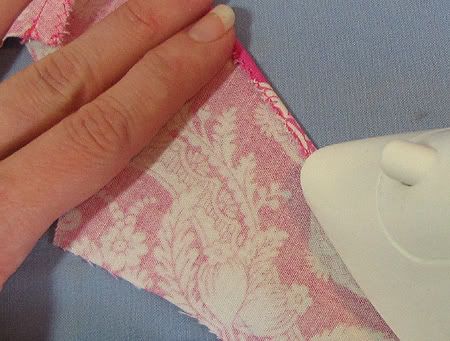
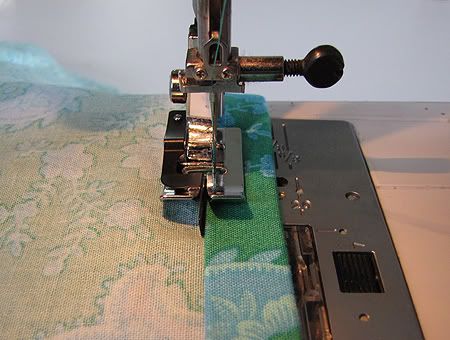
Edgestitching can also be used to hold very thin folds in place. The facing below was edge finished with zig-zag stitching and ironed into a narrow fold.

Photobucket

I aligned the center of the presser foot with the folded edge and set the needle to a good edgestitching position. This put the stitching right through the center of the fold, giving a nice little hem to the facing.

Photobucket

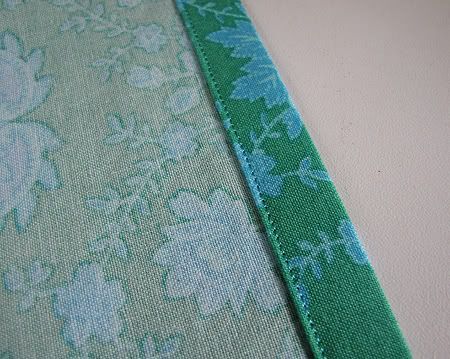
Edgestitching can also be used to attach a facing directly to the inside or the outside of a garment.

Photobucket


As I mentioned, edgestitching isn't technically difficult, it just requires focus and patience...two things that I lack. If I'm in a happy place sewing-wise, I'll often zone out and run off the road, so to speak. And if I'm in a huff and not in the mood to sew, I tend to speed and have terrible accidents. For piecing fabrics, I have a quarter-inch foot that does wonders for keeping me in line, no matter what my state of mind. I did a little research on the web, hoping there was a similar foot to help me with my edgestitching. I found that a couple of machine manufacturers make edgestitching feet, but not mine. So I went to my local dealer and just asked for the heck of it. The owner actually gave me a couple of options, but steered me towards the 
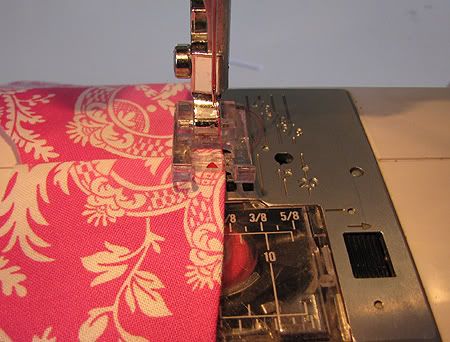
Ditch Quilting Foot.

Photobucket

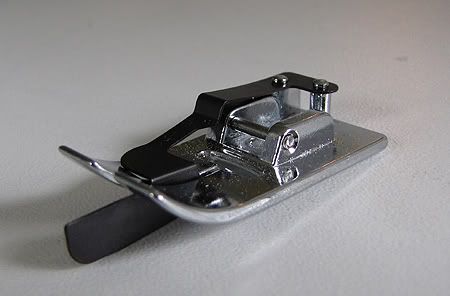
It has a blade in the center that acts as guide for stitching right inside or very close to a seam.

Photobucket

It also works like a dream for edgestitching!

Photobucket

This is one of those things I wish I had learned about 20 years ago. It wasn't very expensive, and it is going to make such a difference in my sewing. Now I can just cruise along in la-la land, edgestitching with speed and accuracy.

Saturday, April 25, 2009

Fun, Hon!

My best girls from Upstate NY are here this weekend!!! Caryn (on the left) comes to town twice a year to sell incredible jewelry with her husband Cole at the Sugarloaf Craft festival. She is also a fellow YCMT author! She is THE Pie Girl who shares her secrets to delectable fillings and an amazing crust in this eBook. We've had so many amazing feasts at her house, and those gatherings were greatly missed when we moved away from Ithaca. I'm so happy that we still get to reconnect in various cities. This time she brought along sweet Julie (on the right), another wonderful foodie friend. She owned the Cabbagetown Cafe in the 70's and 80's, and is a well-known vegetarian cookbook author. Needless to say, when these two come to town, we eat lots of healthy, delicious food.

Photobucket

Yesterday was absolutely gorgeous, and we spent the afternoon in Hampden, the hippest, quirkiest, most delightful little neighborhood in Baltimore. It is home to the Honfest, a celebration of beehive hairdos, horned-rimmed glasses, and all things kitschy. Our first stop was Cafe Hon.

Photobucket

Of course Louie had to wear a retro Bowling Shirt. Julie stole the spotlight in a Sis Boom Tunic by Jennifer Paganelli. I've never seen a grown-up get so many compliments on a shirt! Even Elvis noticed! It was absolutely perfect for her and she was so happy and comfortable in it.

Photobucket

Can you tell what these ornaments are made out of? And don't you just love yoda??? So clever!


Photobucket

The shopping in Hampden is beyond description. I've never seen so many artsy, fun shops on one block. We spent hours browsing and even came home with a few treasures.

Photobucket

Louie was a great sport and completely amused in most of the stores. He was really impressed to see that "big boy pants" were available in size Squirrel! Today we are out to enjoy more lovely weather and of course, more shopping!