
Once upon a time, there was a humble little pattern named Simply Sweet. This pattern was very practical in that it didn't require much fabric and made for a comfortable, wearable style. It was very easy to put together, too - no pesky buttonholes or zippers. As the name suggested, it was just simple, sweet, and cute. One day, a group of creative elves called the Disboutiquers got a hold of this little pattern, and an amazing transformation happened...Simply Sweet became a PRINCESS!!!
I have had lots of requests for princess patterns, but I feel like I already have them out there. I have seen so many regal, yet comfortable and sturdy princess costumes made from my patterns. If you check out our Flickr group, you will find lots of examples of practical princesses (and perhaps even a prince or two). By using creative fabric choices, fun embellishments, and a few modifications here and there, you can create the ballgown of your princess' dreams (then she can wear it in the mud and you can throw it in the wash). Over the next few weeks, I'm going to give a few simple tutorials on "princessifying" some of my existing patterns. Since my son is not a very cooperative model for these types of styles, I'll make the dresses dolly-sized.
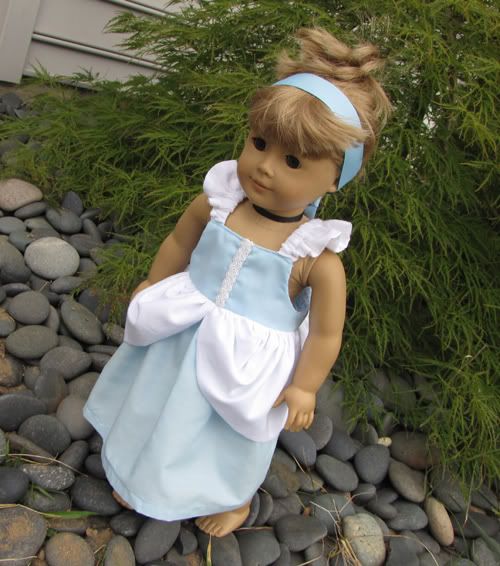
I'll start out with Simply Sweet Cinderella. There are lots of variations on the classic Cinderella dress, both in terms of color combo and design. The main element that makes the dress is a peplum (at least I think that is what it is called) that attaches to the bodice and drapes across the sides ofthe dress. I'm sure there are lots of ways to add this detail, but I'm going to describe one that has lots of "poof," but doesn't require any extra patterns, calculations, or fluffy stuff.
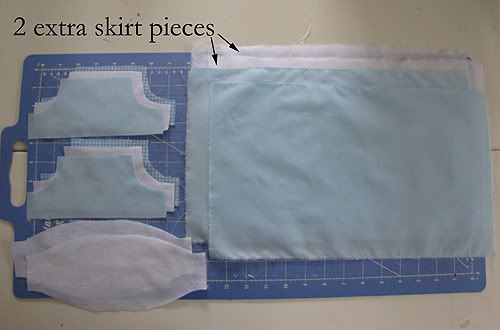
For this dress, I am using the jumper bodice (empire length option) with ruffled straps. Cut the pattern pieces as described. Using the charts provided, determine the dimensions necessary to make a skirt that is calf to ankle length. Cut the 2 skirt pieces as described. In addition, cut 2 pieces (same size as the first 2) from the peplum fabric.
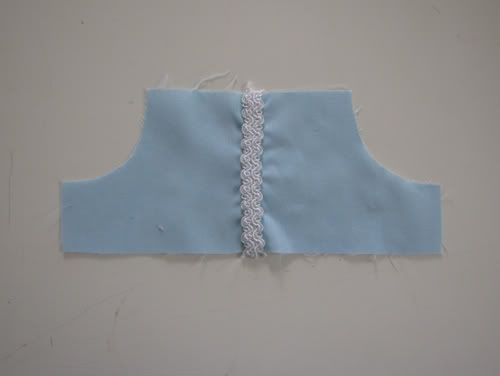
Cindy's bodice is pretty simple...in most pictures it looks like there is a seam in the center. If you want to jazz it up a bit, you can add some pretty trim or ribbon to the center line. The bodice is also a great place to add machine embroidery. My friend HeatherSue has some designs that are absolutely perfect for this particular princess.

Assemble the bodice as described in the eBook. Make the hemmed skirt as described as on page 45.
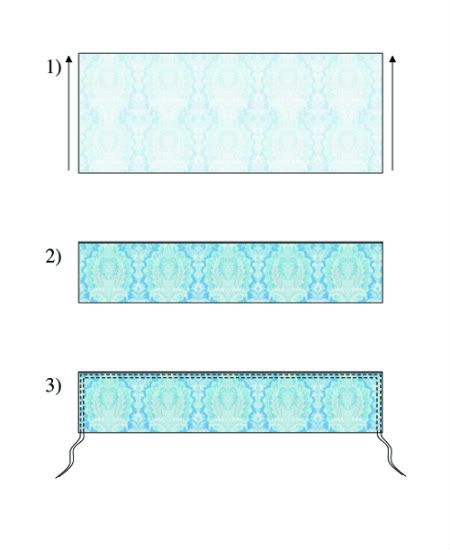
The diagram above shows how to make the peplum pieces from the remaining rectangles. It is very easy - fold the pieces in half lengthwise, right sides facing outward. Run two rows of basting stitches along the raw edges. If you are new to sewing, don't worry - the basting process is described in detail in the eBook.
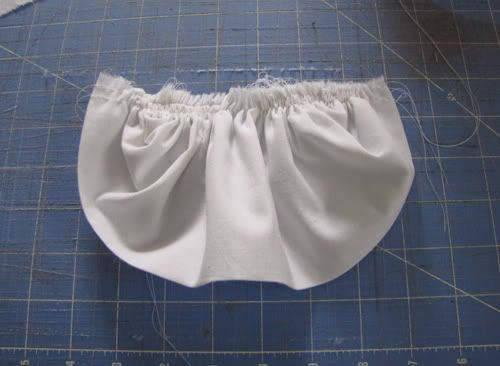
Pull the bobbin threads to gather.
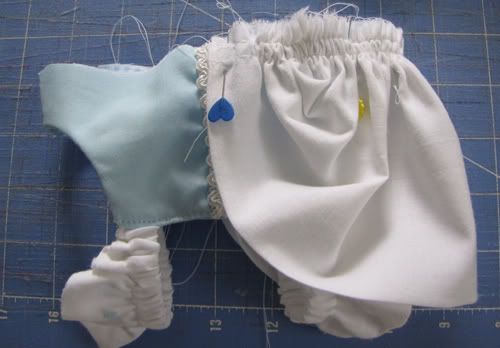
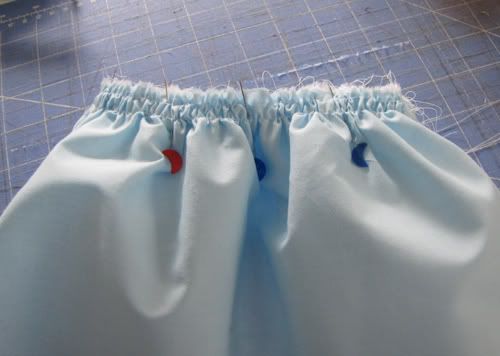
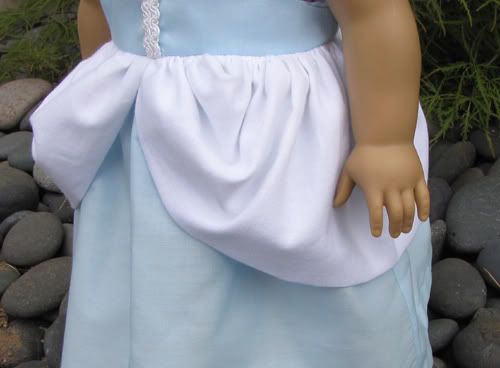
Align the ends of the peplum piece with the midpoints of the front and back bodice pieces. Evenly distribute the gathers.

Zig-zag stitch over the edges to "set" the gathers in place.
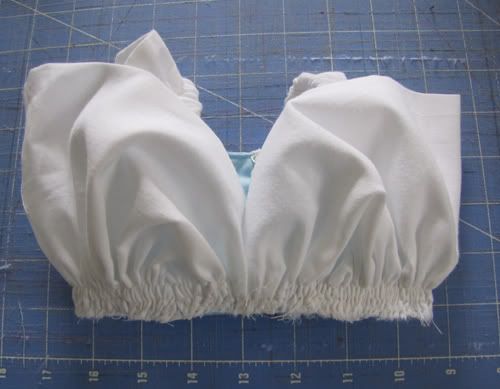
Repeat with the other peplum piece.
Add the skirt as described on page 51.
Remove basting stitches, and turn right side out. The peplum pieces will naturally puff out to the sides of the dress. I usually topstitch at this point to help the skirt hang properly and add interest to the waistline. In this case, I omitted topstitching because the peplum adds a lot to the waistline (both in terms of interest and thickness). If you do decide to topstitch, make sure to use a heavy duty needle.
I had a "ball" dressing up dolly!
Please let me know if you have any requests for the next royal star :) !
25 comments:
Carla, have I told you lately how AMAZING and wonderful I think you are?? Well, I think you are wonderful and amazing!!!! This is fabulous!!! How about Sleeping Beauty next?
Lydia was walking by and stopped dead in her tracks and said, "Did Carla make that? It's beautiful!"
Thank you, thank you, thank you. I knew you would make it all make sense! It took me three days to get something that did not look anything like that! I'm almost tempted to rip them both out and start all over!
Nini
Oh, thank you!! This is wonderful!
Thank you! I love it and can't wait for the next princess. How exciting. :o)
Oh Carla this is a fabulous tutorial!!!! I love it!!! This will be so helpful to me when I have to princessify dresses!!! I just love how you are doing it dolly size too! Great job! I will be waiting intently for the next installment! THANKS for being so wonderful!!!! Love ya!!!
Carla, the chart that shows how to fold the peplum is just a red x. Can that be fixed?
I just looked at the directions for princessfying the simply sweet. The picture that shows how to do the peplum doesn't come up on my computer, it's just a red x.
I tried resizing it in Photobucket...let me know if that helps!
Very cool! Megan was just telling me her doll needed more clothes: maybe princess outfits? Thanks so much for the tutorial!
GREAT tutorial, Carla! So glad you've decided to give instructions - you have such a great way of explaining things step by step!
Thanks Carla, that took care of it. Now I can see how you did it. I wondered if you had gathered all 3 sides.
Love this! I love how you did the peplums. What a great idea!
I'd love to see Mulan or Jasmine. :)
I know I sound like Teresa, but have I told you lately you are a genius? I have made a peplum before and it was harder and not nearly as cute. I do believe I'm rethinking my neices birthday Cinderella dress! I also vote for Aurora or Ariel.
Carla is a GENIOUS!!!!!!!!!!!!!!!
Adorable!!
Im considering using the Precious Dress as the basis for a couple of dead bride costumes. You may have just pushed me past "considering"...
Not to stir up trouble...but seeing the blue gingham lining on this dress makes me think you should do a Dorothy Gale dress....and ruby slippers!
A-HA!!! I wish I would have had this when I put a peplum on Tessa's Jasmine outfit! I redid that stinking thing several times and it still doesn't look right! I could have done it much easier with this tutorial! Thank you, Carla!
Just a suggestion: if you fuse a strip on the back side of the piece before applying the embellishment (this photo: ssprincess3.jpg), it'll pucker less -if at all. I'm fond of that nylon tricot fusible for this sort of thing. Actually, fuse the whole piece. It lends an undefinable crispness to the finish and will full the top stitching. Imo, people don't use nearly enough fusible. More is here: http://bit.ly/KniiP
Fwiw (this is my first visit here), I think many people don't realize how technical drafting is. It's an engineering function rather than an artistic one. As such, people with a grounding in hard sciences and math tend to do well with it.
Love Cinderella and Belle tutorials. My granddaughter's favorite is Ariel. Love to see that next! Thanks!
Just found your blog, I have a lot of catching up to do.
you are my hero for this! thank you!!
Thanks so much for this! I made Isabel a casual Cinderella outfit using your Simply Sweet pattern, HeatherSue's embroidery design and this tutorial! THANKS!
Thank you soooo much for this! I was able to make Isabel a casual Cinderella outfit using your Simply Sweet pattern, Heather Sue's embroidery, and this tutorial!!!
Thanks so much!
this is the first time i have been on pintrest and just love what you have posted it is wonderful
Post a Comment