
We are so excited to have Heather on the blog today to show how to do her Ethan FLIP!
Hi! I am Heather from Creative Bug! I mostly create adventures for children through summer camps and birthday parties but I love creating for our family in my spare time too. I sew, I bake, I bead, I pretty much will try anything! Look me up on Facebook and you'll keep up with the latest over here.
I hope you enjoy this tutorial...I have never done anything like this before (altered a pattern or made a sewing tutorial) so I'm sorry if I missed anything please ask any questions and I'll do my best to answer!
Thank you to Jeanine and all the other ladies at Scientific Seamstress and SisBoom for giving me the courage and know-how to make this happen!


Pattern Pieces
Print, cut and tape the following:Hi! I am Heather from Creative Bug! I mostly create adventures for children through summer camps and birthday parties but I love creating for our family in my spare time too. I sew, I bake, I bead, I pretty much will try anything! Look me up on Facebook and you'll keep up with the latest over here.
I hope you enjoy this tutorial...I have never done anything like this before (altered a pattern or made a sewing tutorial) so I'm sorry if I missed anything please ask any questions and I'll do my best to answer!
Thank you to Jeanine and all the other ladies at Scientific Seamstress and SisBoom for giving me the courage and know-how to make this happen!
- Shirt Front
- Shirt Back
- Back Yoke
- Top of Sleeve
- Placket
- Button Hole Placement Guide
Alter pieces as follows:
Shirt Front
Mark 2.5" from top of collar at the mid point of the shirt front and 1.5" from the sleeve edge. Cut as shown (I do this freehand and use the original collar as a guide).

Shirt Back
-Cut a deep triangle between notches on the back of shirt. Overlap notches and tape. Overlap Back Yoke piece ½" on Shirt Back and tape as shown below.

Line the Back Yoke/Shirt Back piece you made earlier up with the Shirt Front. Use the Shirt Front as a guide to cut the neckline of the Back Yoke.

Cutting Fabric
Cut one Placket from fabric and one from interfacing as directed.
Shirt Front
Measure 3" (size 4), 3.5" (size 6/8) to 4.5" (size 10/12) out from the bottom corner of the shirt front. Mark (photo 1). Line up from tapered spot just under the arm to the mark you just made and mark with disappearing ink to create a flare (as shown in photo 2). Cut top of shirt front, arm and down flare (photo 3).

Slide pattern over to match the corner of the pattern to your mark (Photo 1). Use a straight edge to cut straight across until you get to the curve (photo 2).

Shirt Back
Cut Shirt Back following the pattern for the upper part, match the flare for the side.


Cut curve on the side to match the corner of the Shirt Front ( I did this free-hand but you might prefer to mark it with disappearing ink first).

We are almost done the tough bits, I promise!
Facing
Cut a facing piece for the Shirt Front and one for the Shirt Back. I cut my facing to about 1" below the underarm so it would stay where I wanted it (I hate it when it moves around!)


Sleeves
Fold Sleeve pattern piece in half, use the half with the double notch. I cut my sleeves 3" long (measured from the underarm) for size 10/12 and 2.5"for size 4-8 (photo 1). Place it 2-3" from the fold and cut across from fold to follow the pattern piece. This extra fabric will give you a nice gathered sleeve (photos 2&3).

Finally! All of your pieces are cut!
Sewing!
Start by following the directions for the Buttonhole Placket Construction and Attachment (I made mine the opposite of the directions so the buttons would be on the girl side).
Press edge of facing in 1/4" then lay over top of first Shirt Front (right sides together) and press to line up edges. Repeat with the other side of the Shirt Front.

Top stitch folded fabric and zigzag the lower edge of the facing to finish it.

Pin facings right sides together on 2 shirt front pieces and 1 shirt back piece and sew along neckline.

Turn all 3 pieces right side out and press along neckline.

Top Stitch to secure pressed part of facing. Zigzag or serge lower part of facing to finish it.
Sew Shirt Front pieces together with Facing pieces from neck to shoulder. Sew Shirt Back piece to facing along neckline and zigzag lower edge of back Facing. Turn 2 Front Shirt pieces and Back Shirt piece right side out and press. Open Shoulder pieces up and sew Front Shirt Piece to Back Shirt Piece at shoulder seams.

Open front and back at the shoulders and match the facing and shirt shoulder edges together. Sew. Do this to both sides and then fold back and press.

With wrong sides together Top Stitch along outside edge of Shirt Front and Facing pieces to secure them together. Baste Shirt Front and Back to the Facing along the sleeve edge to hold in place.

Shirt Sleeves
Press both sleeves 1/4" and then 1/2" from the bottom.

Sew two rows of gathering stitches from notch to notch of both sleeves at 1/8" and 1/4" and gather evenly to match the sleeve edge to the shirt edge. Carefully align the edges pin and sew 1/4" from the edges. Finish with a zig-zag stitch.
Open pressed hem of sleeve and align right sides together from end of sleeve to bottom of shirt as directed.

Top stitch sleeve 3/8" from the bottom edge leaving a small gap to put the elastic in.
Collar
Top stitch 1/8" from the collar edge going from one edge of the shirt front to the other. Top Stitch a second time to create the casing 3/8" from the first line of stitching starting and finishing 1/2" from the button hole and button plackets so you can feed the elastic through later.
Measure desired length of 1/4" elastic and feed through sleeve bottoms and collar of shirt.
Finish shirt as directed.
Belt
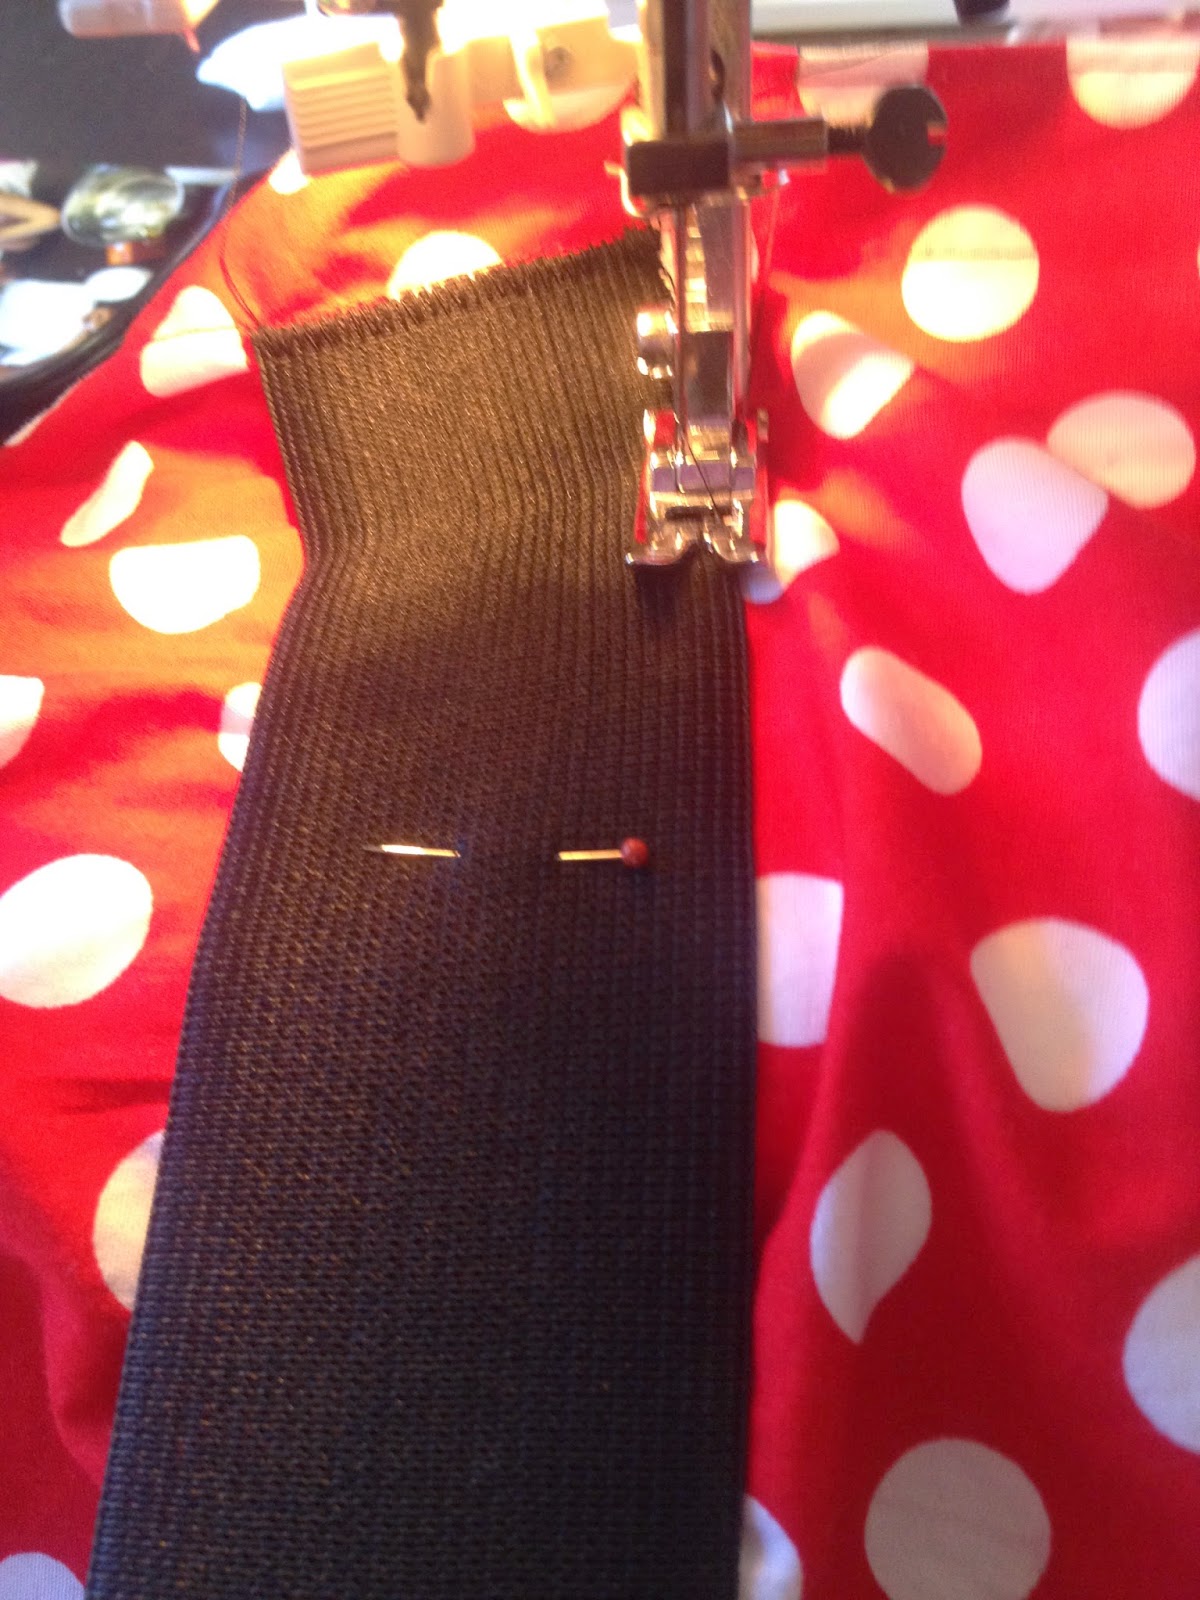
Measure desired waist size (I measured their waist +1 for comfort) and cut 2" wide elastic or create a casing to feed elastic through to create the waist of the shirt. Mark the elastic at the 1/2 and 1/4 points and line those up with the shirt at your desired spot - I like to put the elastic between the 4th and 5th button holes.


Stretch elastic and pin! This is tricky to do on your own! My son took the picture, sorry about that!

Zigzag the elastic to the shirt on both short ends. Stretch and sew the elastic to the shirt along each long side.
Just one more thing...to avoid gaping (from the elastic) I stitched the placket to the button side of the shirt between the 2 buttons.


Here it is! This shirt (and the 3 below) are being shipped later this week so no model photos for you. Sorry!

Thanks for joining me on this journey...I know it wasn't a short one! The Creative Princess loves her Ethan Flip so much! I'm sure she'll be asking for more of these...in fact, I am thinking about making one for me!

Enjoy!
Heather
1 comment:
Hello I am loving your blog.
I wonder if he could teach me how to do shirt bar cornering. as in this post and if you have any easiest way to do it.
Thank you in advance.
Cynthia Simões
Post a Comment