Monday, September 29, 2014

Adding Pockets to the Portrait Peasant


This week on Project Run and Play it is denim week!!!! 
This was the week I was most nervous about, but I actually got it sewn before upcycle week haha. Turns out I didn't have to think toooo hard on how to make denim week not overwhelmingly 90's !

I used the portrait peasant for the top and the easy fit pants for their bottoms. Both the necklines are in the pattern. So, today's tutorial is for adding the pockets! 


I made a size 5 and 2 and my pocket pieces were 6 and 7 inches tall and I made them 9 inches wide (better a bit extra than not enough). Serge or zigzag your ends. and then you will fold over the one side that will be in the center of the shirt and then fold over the top edge 1/4 inch and then another 1/4 inch. You can also add a hemband along the top as you will see in a little bit.


Next, you will pin your pockets onto the fronts and sew along the inside edge and then baste along the bottom and around the outside edge. Then you will just finish sewing up the portrait as per the pattern!


I personally LOVE the pockets on peasants! My kids also adore the pockets and promptly collected rocks and leaves and things when we went out on our picture walk !


Anyone want to guess what I'll be sewing/showing for signature style week next week?


Friday, September 26, 2014

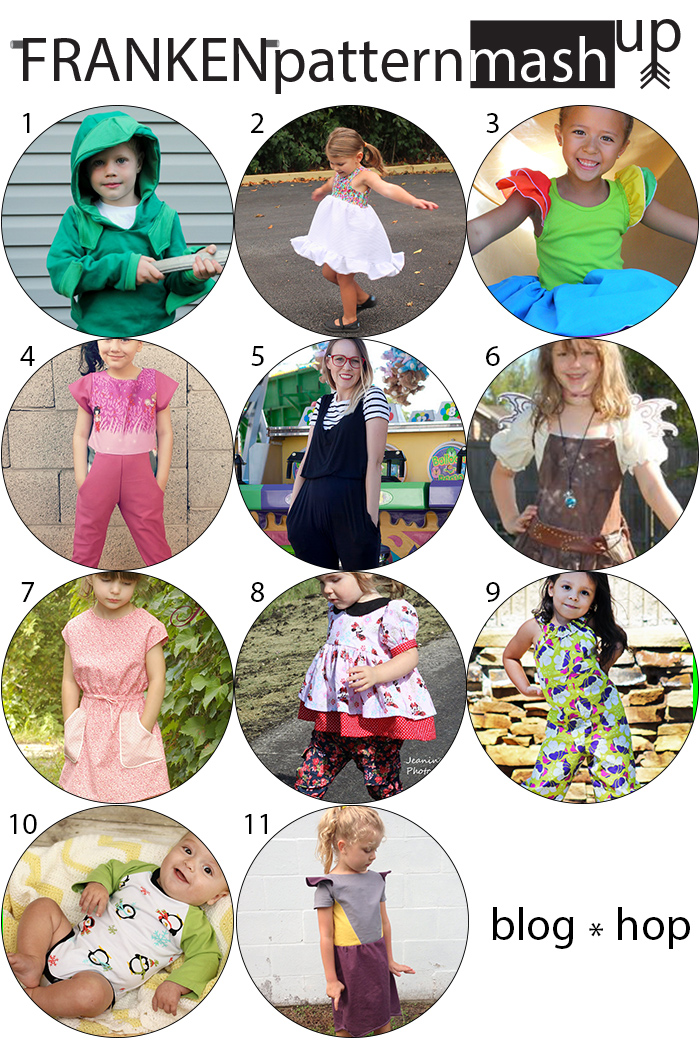
Pattern Mash-Up Blog Hop


I had so much fun challenging myself this week with pattern mashing!

If you missed my post check it out here : Katie's mixed with the Field Research Pants

There were some other really fun posts and mash ups in the blog hop that you should check out!


Pattern mash up blog hop
  1. Knight Hoodie + Bimaa Sweater by Boy, Oh Boy, Oh Boy Crafts
  2. Alleycat Daydream Dress by Call Ajaire
  3. Rainbow Princess Dress by Rae Gun Ramblings
  4. Ash Jumpsuit + Vintage Style Flutter Sleeve by Amanda Rose
  5. Burda Harem Pants + McCalls Dress by Lil Bit and Nan
  6. Sugar Plum Princess Dress + Poppy  Dress by Bee Quilted Beauties
  7. Dress #13 + Pants #2 by Sprouting Jube Jube
  8. Katie Fancy Pant + Field Research Pant by Scientific Seamstress
  9. Jumpsuit Mashup by Sew Like My Mom
  10. Lullaby Line Body Suit + Grand Slam Tee by Peek-a-boo Pattern Shop
  11. Cherry Pie Skirt + Socialite Peplum by Sewing Sober

Tuesday, September 23, 2014

Pattern Mashup: Skinny Legs Katie Fancy CARGO Pants


So a couple weeks ago I showed you Cheeks Precious dress as a top Minnie birthday shirt. 
Today it is the day to share with you the second part of her look - the pants!


For these pants I used stretch denim and the Katie Fancy Pant pattern in her almost outgrown size (18m). I skinnyfied the leg and then I added the Field Research Pant cargo pockets to the legs!


To skinny the leg you simply fold in the flares as seen below. I also skipped the facing and just did a double fold for the hem (added a little extra length to the pants to account for this)


I sewed the pockets on exactly as in the Field Research Pants directions and attached them about knee to the sides as shown in the FRP directions.


I still think this is one of my favourite outfits for Cheeks! I love the modern Minnie top and the skinny floral pants with it totally brings in a modern feel but still "kid". 


ps. my husband said right aways when I finished sewing this look that he liked both pieces separate but thought the top with the bottoms was too busy! I told him he was crazy because I love it! haha.

Whose team are you on? Would you pair all these prints together or do you prefer them separate?

Monday, September 22, 2014

Raging Raglan Upcycle!


This weeks theme on Project run and Play is upcycle! So I thought and I thought.... and I was soooo stuck on what I should make! Upcycling in summer I had plenty more ideas... But I needed something cozy! 

I got the only 3 pieces that matched in my upcycle tote and realized they are all knit! So the All the Rage Raglan was meant to be!


I colourblocked the top by simply cutting the pattern where I wanted the colour block to be. The skirt I used for the dress portion of the front piece. I gathered it to fit the width of the top colourblocked piece. The maternity tank was a great amount of fabric for the top front colour block and the hood. The polka dot tank gave me the sleeves.


This dress is a little long right now, but it is cozy for winter and should still fit in the spring!


Perfect for running and playing in and long walks with puppy.


What upcycling have you done lately?

Monday, September 15, 2014

Mouse Birthday Precious Top for a Precious Birthday Girl


Our darling little Cheeks is 2 !!!!


This little cutie just LOOOOOVES Minnie and Mickey Mouse! as in she is completely obsessed! 

So when I heard the Project Run and Play's themes and the 1st one was 80's cartoon I knew exactly the outfit I would blog! I don't know about you, but I watched a lot of Mickey and Minnie in the 80's!


I used the Scientific Seamstress Precious dress. I wanted a classic Minnie looking dress, but also wanted to make it a bit modern for everyday wear and not a costume. I am a practical seamstress. I like everyday wear outfits.


I  just adore the finishing details on this dress, the hidden button placket is such a nice touch. Especially since I used snaps... Cheeks doesn't hold still very well during getting dressed so I like fast closure options.


I did a double skirt layere to get the classic red polka dot on there and to tie in the sleeve bands. The black collar I think brings the shirt into a modern feel versus the traditional white collar.


The pants are the Sisboom Katies, but they are for another blog post :)


Happy Birthday Cheeks! 


Wednesday, September 10, 2014

NEW pattern in the Etsy!


Our latest pattern is now in the etsy shop!

You can read all about the amazing pattern details and options in THIS post

Wednesday, September 3, 2014

Straighten the sleeves on the Emily/Shana


Normally the Sisboom Emily (and Shana) tunics have a gorgeous bell sleeve, which I love! 

however... Cheeks has very short limbs and bell sleeves tend to fall into everything when she wears them, so for her Emily I decided to do a straight sleeve and a quick how to for you!


(Berry showing off those gorgeous bell sleeves)


If you want straight sleeves all you need to do is attach the bell piece right under the sleeve piece and just fold it over - you use the bell sleeve cutting line you want for length that way still, but end up with a straight sleeve!  


Is that not one of the easiest tutorials? haha. I'll have to think up something a bit more fancy for next week... Any ideas?

I also did straight sleeves on my Shana tunic last fall!


Now  no reason to pout about fall, there are some GREAT patterns available in the shop for fall sewing!